I had a request over the weekend to provide further details about how I did the Silver Efex conversion for the Friday 003 image. So here is a high level breakdown of the work.
Step 1 – Start with the end in mind
This involved looking at the image and understanding how I wanted it to look when finished. I won’t go into too much detail here as you can see the finished conversion so you know what I had in mind. I will point out though that I sometimes make notes and rough drawings to help develop an idea before I jump in with the processing.
Step 2 – Create the base image
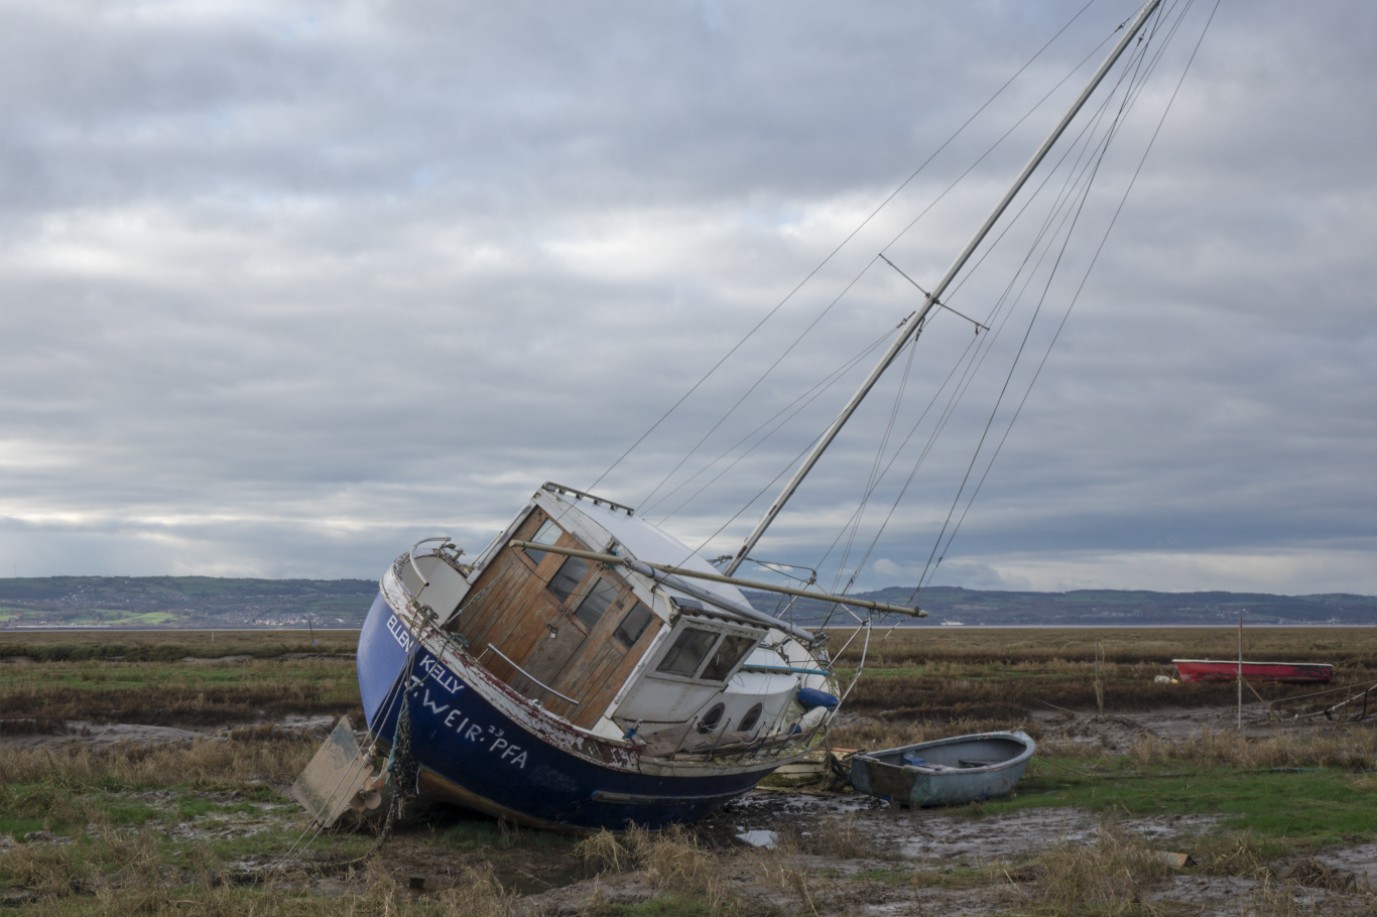
This involves making adjustments in Lightroom or whatever RAW converter you have to produce the best quality starting image. Quite often this involves contrast and colour adjustments that will help the ultimate conversion to B&W. For example by making all the colours stronger I can separate them better when I convert the image to black and white. You can see the starting image below.
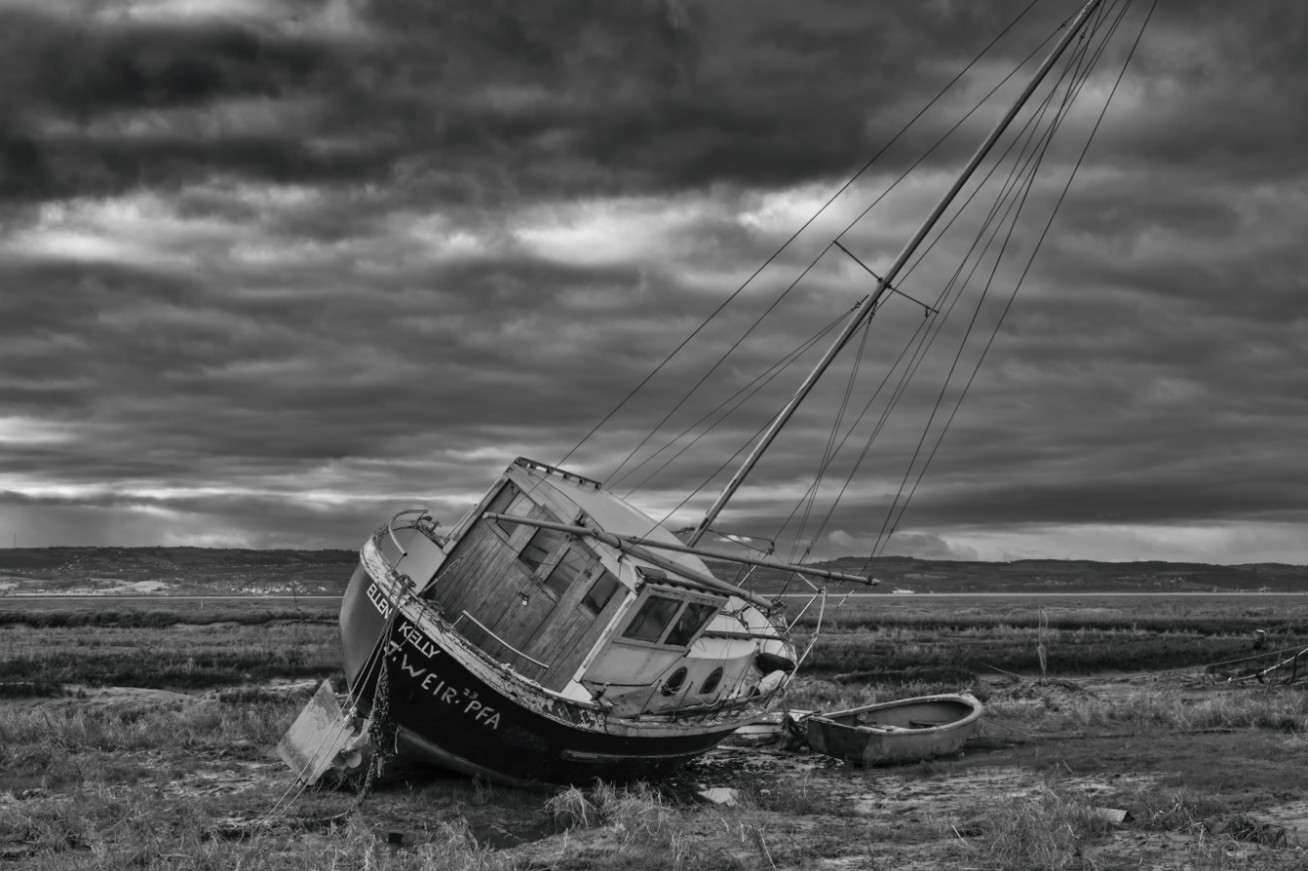
Step 3 – Clean up
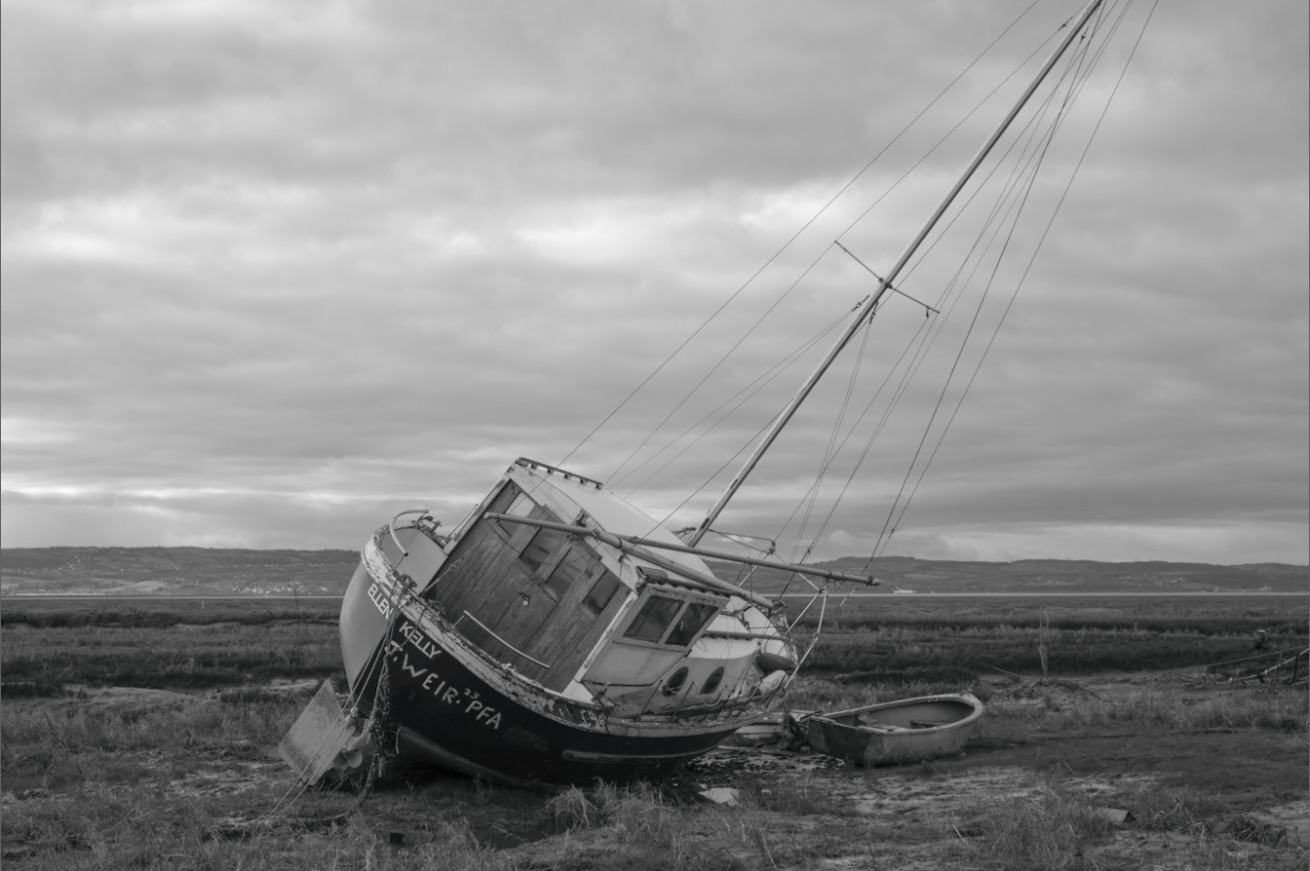
Here I removed the red boat on the right side as it was distracting. I then applied Nik Dfine to remove any noise in the image followed by Nik RAW sharpener. This produced the starting image for the conversion which you can see below.

Step 4 – Nik Silver Efex Conversion
I start with the Neutral preset as I know what my finished image should look like and I also understand how to create this. Sometimes it can help to review the presets if you aren’t sure what you want to do.
First I apply a Yellow filter to help darken the sky and lighten the ground slightly. I also increase the filter strength to 100% from the default 50%. It’s then time to emphasise this effect even further using the Soft Contrast slider and a setting of -40%. You can see the result below.
This has achieved a good balance between the foreground and the sky but overall the image is too light. I use the Dynamic Brightness slider at -50% and the Amplify Black slider at +20% to address this. The result is shown below.

Next step is to make the sky more dramatic so I make a selection with a group of control points. I then increase the Structure and Amplify Black sliders to +20%. The result is shown below.
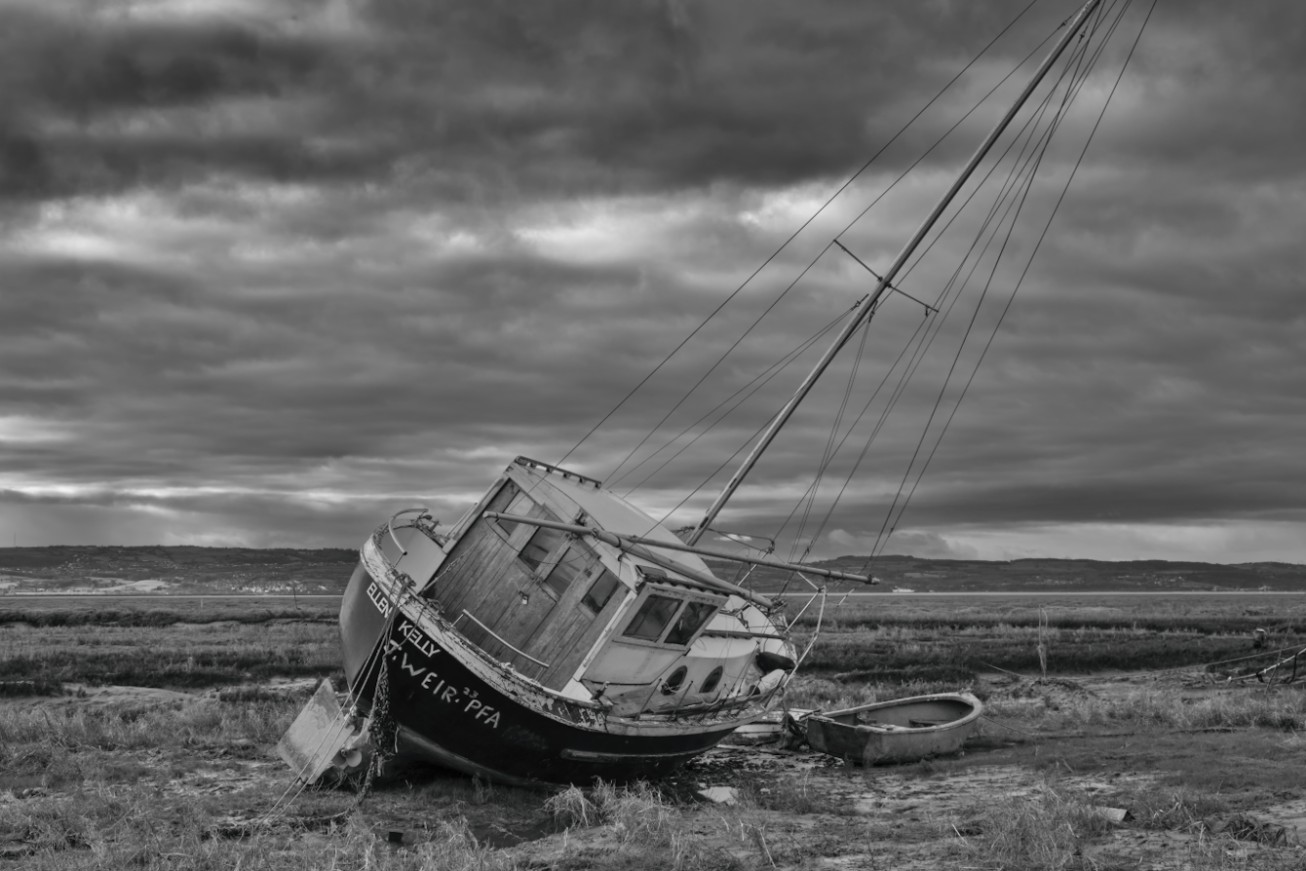
Next I add a curves adjustment to darken the lower 2/3 of the tonal curve. The resulting image is shown below.
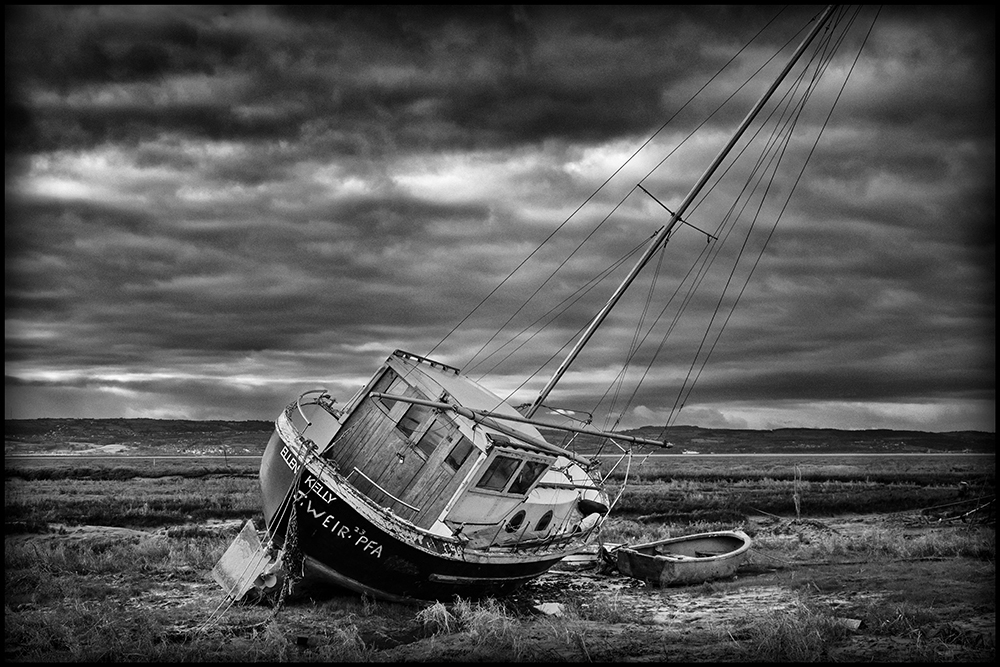
My final step in Silver Efex is to add in some grain. I gave up with the grain sliders at one time but recently they have been improved and are now quite good. I use a grain setting of 400 which is quite fine. I used to shoot using Kodak TMax so quite like the fine grained films.
Step 5 – Dodge and Burn
In the previous version of the image I used Nik Analogue Efex to add a vignette and film boarder (admittedly it was a slide film boarder but I liked it). In this version I dodge and burn in Photoshop to produce the image at the very start of this post. I also tweaked the contrast further using another filter called Contrast Master from PhotoWiz. I made these final changes differently because I took more time over the edit, deciding I wanted to make an A3+ print of the finished image.
I hope people find this helpful. If you want to know more about Nik Silver Efex or Photoshop, I will make a quick plug for my books which you can find on Amazon. There are further details of these in the blog menu for anyone who is interested.

Robin, that is very kind of you to go to so much trouble and provide this tutorial for B&W conversion.
It is extremely helpful and very informative thank you again.
I can certainly recommend Robins e-books which are easy to follow and I found the work through examples a great help
Dave
Hi Dave,
No problem at all and thanks for the idea.
Robin