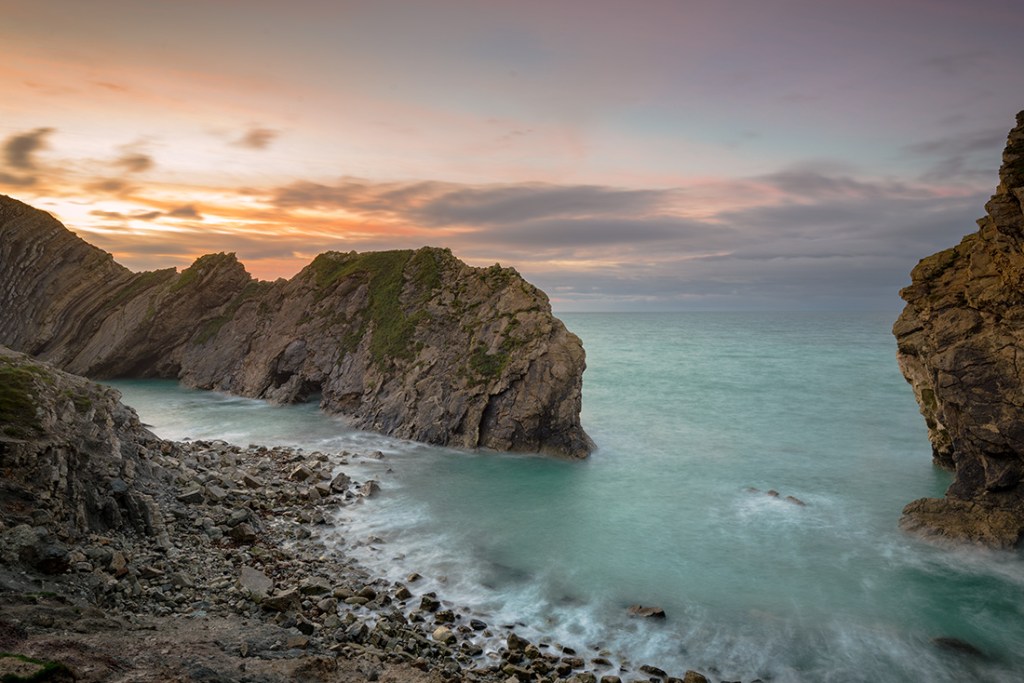
A couple of weeks back I showed a post of Lulworth cove shot at sunrise and passed comment about how easy it now seems to be able to lift detail from extreme shadows with the Sony A7r. Someone mentioned that it would help if rather than me talking about seeming blacks in the RAW file, I were to post a before and after comparison. This short post is my attempt to share a little more on the subject.
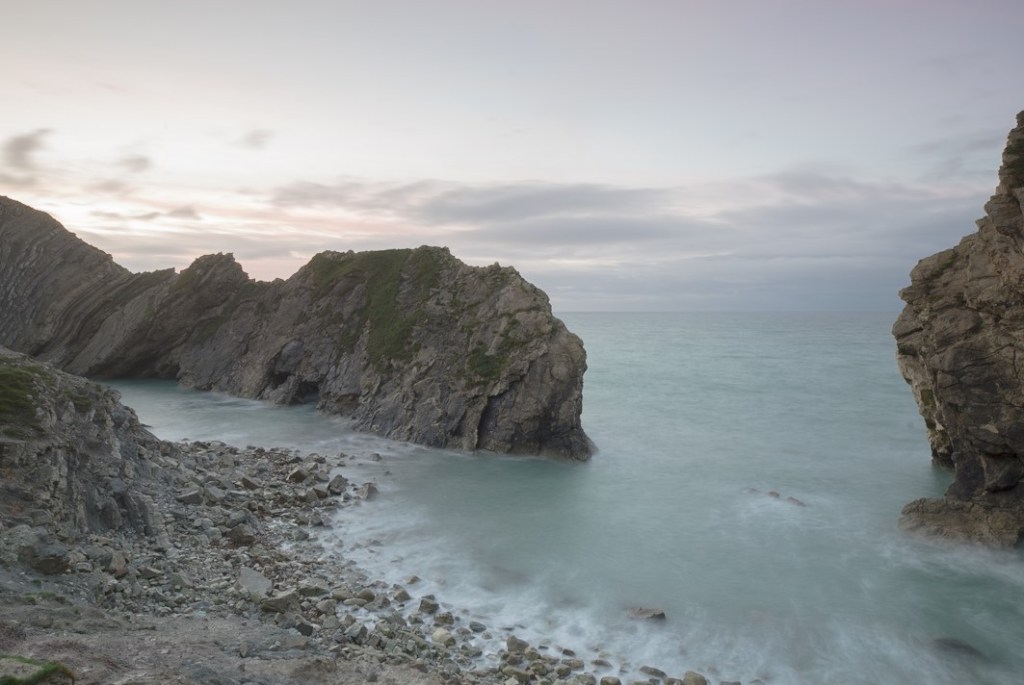
Take a look at this starting image.
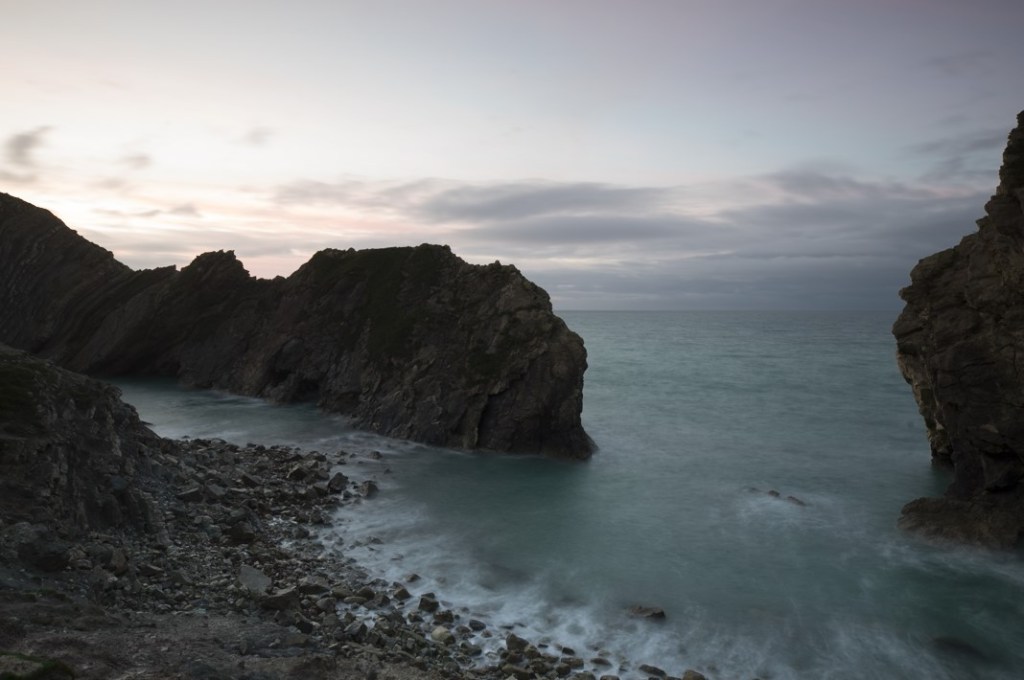
The image was captured using the Sony A7r with Canon 24-70 L series lens. As you can see, the scene is quite high contrast as I was shooting from an area of shade towards the sunrise. At the time I only had a 0.6 ND Grad filter with me, although had I used a stronger filter I would still have encountered problems with the rocks.
As the image was shot in RAW format, I hope to extract much more detail from the dark areas using the Lightroom. Here is how I processed it.
- I increased the exposure to +1.6 and also reduced the contrast to -70. This has the effect of opening up the shadow areas and revealing the detail as can be seen in the screenshot below.
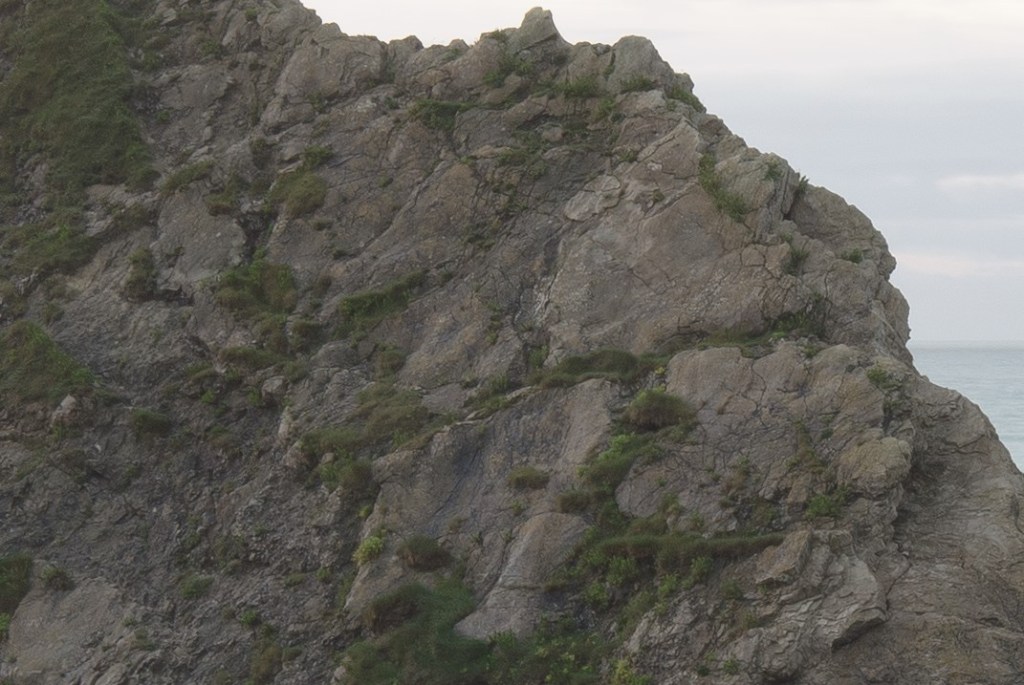
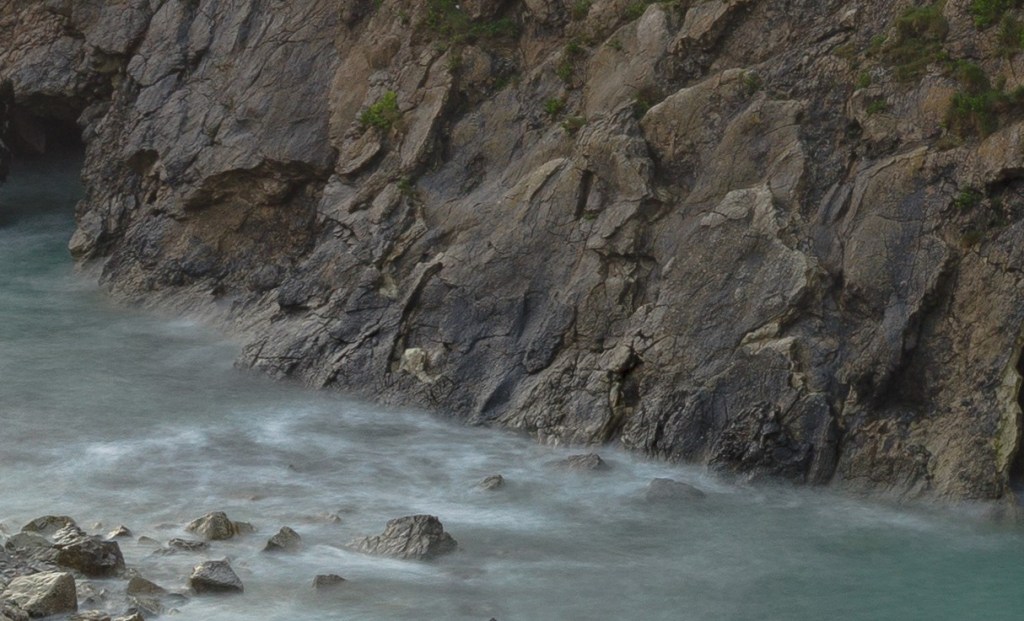
- Although this makes the image look very flat and too light, we will be able to correct these problems shortly. The key thing is that the details hidden in the shadow areas has been revealled. If you take a look at some of these areas at 100%, you can see just how good a job the Sony A7r has done at capturing this information.
- Next I reduce the Highlights and Whites to -65 each. This helps to recover some of the lost highlights that were blowing out to pure white as a result of my increasing the Exposure slider so much.
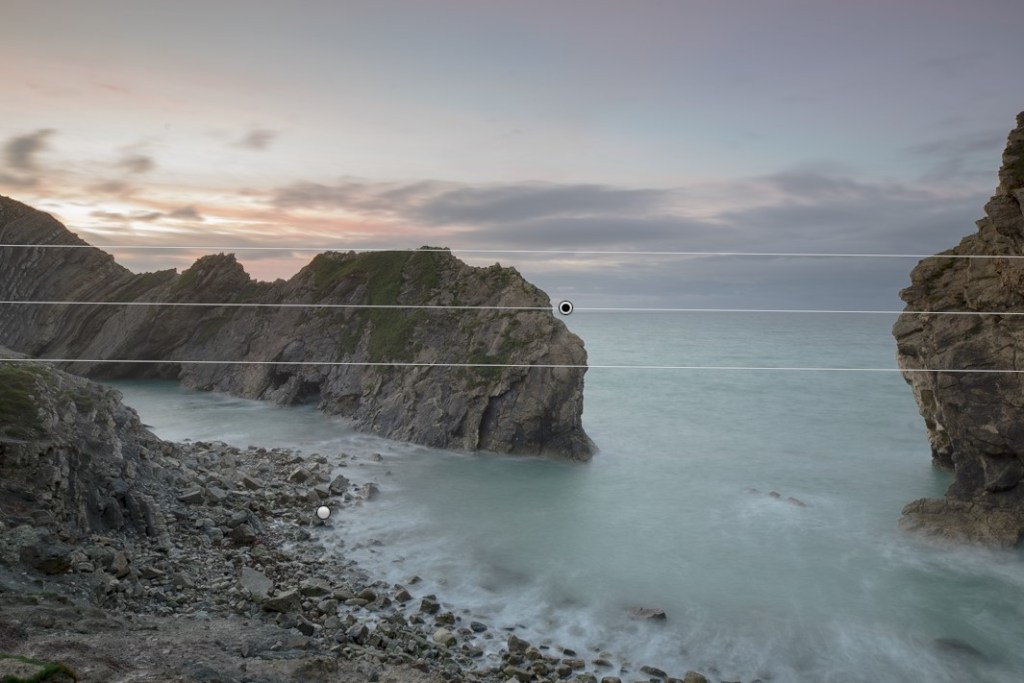
- A few problems are now quite evident. The rocks in the foreground are appearing too light, there is a complete lack of saturation and the sky is lacking the impact we previously had. We can address some of these points using the Gradient filter. I add one to the sky and one to the rocks in the foreground.
- In the next shot you can see the selection for the foreground rocks. Here the exposure was reduced to -1.0, Contrast set to -10 and Highlights to +20. These adjustments were to darken the area but avoid losing too much contrast. I then increased the Clarity, Dehaze and Saturation to +15 each.

- Next the selection was made to the sky area and applied adjustments to reduce the brightness and add in more structure and saturation to the clouds. You can see the selection with adjustment applied below. The Exposure has been reduced by -0.70 as well as contrast by -20. Additionally, the Highlights have been reduced to -20 and Shadows increased to +20. Finally, there was an increase to the Dehaze and Saturation of +15.
- The image is starting to look acceptable but requires more work. It still doesn’t suggest an early morning shot as much as I would like it to. I would like the colours to be more a little more vibrant and I want to focus the attention away from the edges of the frame by applying a darkening vignette. In the following screenshot you can see the result of these changes.
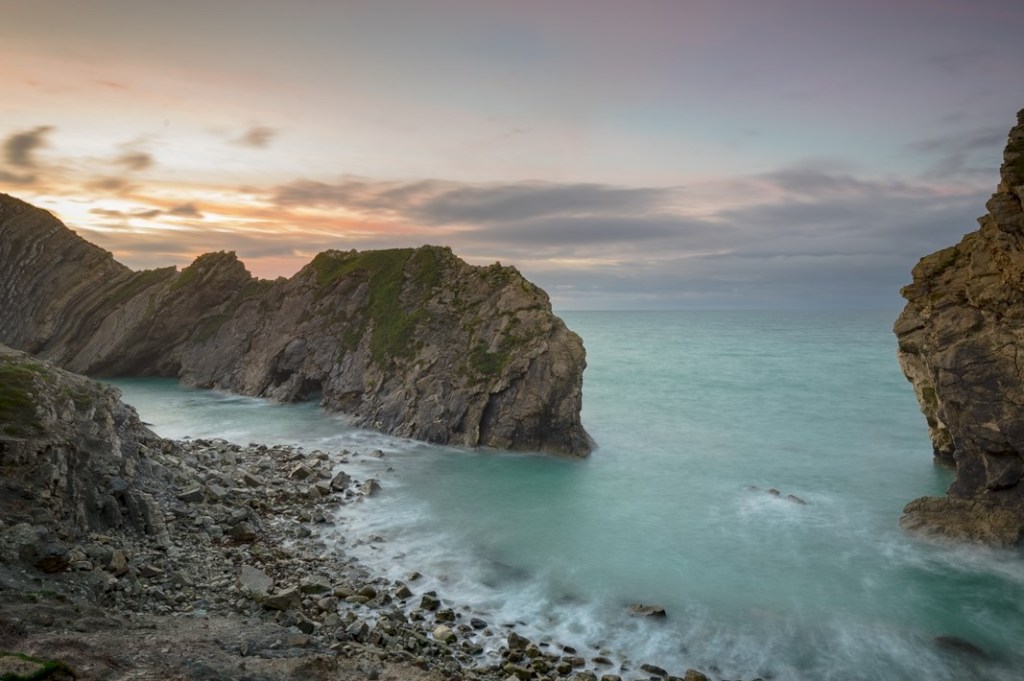
- Finally, I added a tone curve adjustment to slightly emphasise the feeling of daybreak and tweaked the saturation levels using the HSL tool to arrive at the finished image. If you zoom in to 100% magnification on some of the areas that were previously shadows, you can see how much detail is present and how little noise. The next screenshot demonstrates this. And by the way, the only noise adjustment was +10 on colour noise.
I hope that you like the transformation and what can be achieved with Lightroom and a RAW file. I may turn this into an extended course with supporting video if there is interest. I have skipped over quite a few things that I am assuming Lightroom users will already be familiar with.

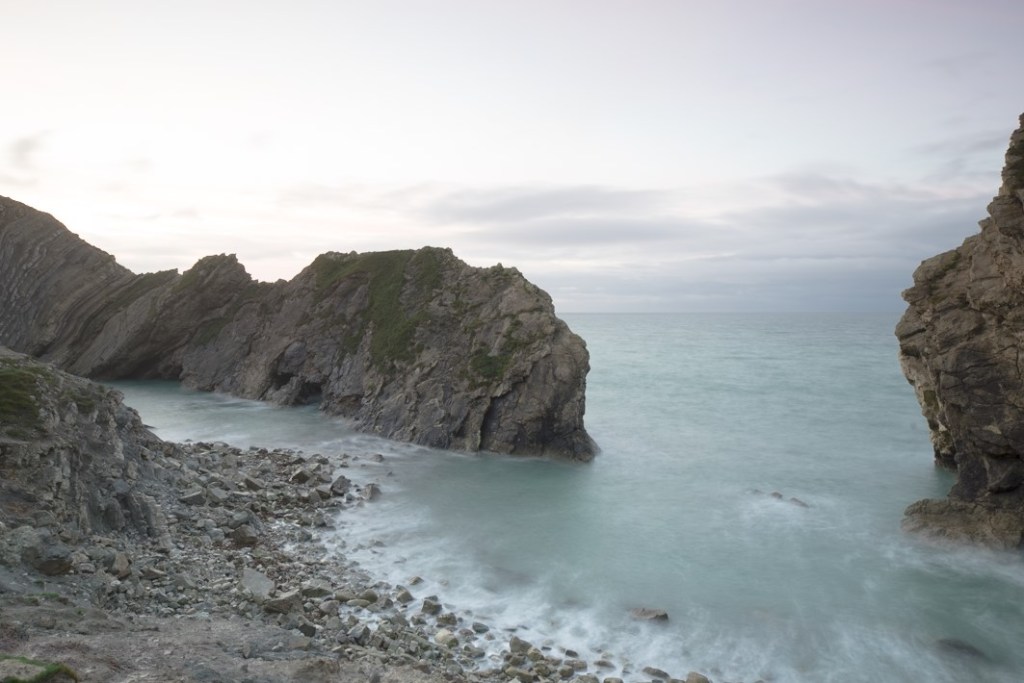
Last time I was there 50+ years ago there was an arch where the gap is now!
There are actually a couple of arches in the main rock in the centre but the tide was very high and they are pretty much submerged. Later in the day they were clearly visible and you could see right through them. Having said that, I don’t know if there was a larger arch in the past. I would certainly think it possible. Lovely spot though.
Found this post very interesting. It’s very helpful to see how others use Lightroom (particularly those with much greater expertise than me!). Would be interesting in seeing more Lightroom techniques explained like this. Thanks!
Thanks Peter. Good to know that you found it useful. I tend to post the longer tutorials and articles on my Lenscraft website and use the blog just to share the things that I’m experimenting with. If you aren’t aware of my Lenscraft site and the tutorials, here is the link
https://lenscraft.co.uk/resource-hub/photography-tutorials/
Thanks Robin. I’m registered with the Lenscraft site – should have remembered about your tutorials there!!
Hello Robin.
your post of processing Lulworth cove in LR. was very interesting, as to how you arrived at the final image, the final results were very impressive. I have gone back to using LR. more.
Thanks John, I’m pleased you like it. I am just finishing off an eGuide describing the processing from start to finish which includes a video and the original RAW file. Hopefully I will have this available in the Lenscraft store this month and aim to price it around the £4 mark with a 20% discount for Lenscraft members – less than the price of a magazine. All the best. Robin