Not too long ago I related how I had been struggling with the small size of my Olympus OMD EM5 when using it on a tripod. My solution to this had been to buy the two part grip and also to use an L-bracket from Novoflex. The Novoflex bracket wasn’t required to solve the size issue but was the solution to another problem of how to shoot stitched panoramic images with the camera positioned vertically. If you didn’t read the original blog you can find it here.
What I didn’t say in the original article is that I had even considering buying a Nikon D800E together with some lenses. Not a decision I would take lightly, as I am after all the Lightweight Photographer. I therefore decided to try an extended period of working with the Olympus on a tripod. This weekend past I had my opportunity to do just that. Here is what I found.
Firstly I need to share my decision. I won’t be buying the Nikon or any other DSLR for that matter. The OMD EM5 was a joy to work with on tripod using my new setup. Despite the Nikon D800E being a wonderful camera, there are some aspects to the camera that make me think it’s a backward step.
The new found size of the Olympus with the grip attached made it perfect for tripod work. Not only that, I found it very easy to work with and the L-bracket was perfect for quickly shifting the camera to a vertical orientation. If you are interested in shooting panoramic images but don’t yet have a head, then I really recommend you get one of these
Finally, I want to reveal my new panoramic set up for single row shooting and stitching.

As you can see, this uses my Novoflex L-bracket attached by the Novoflex Q-Mount plate. The Q-mount has then been attached to a Macro focus rack which is used to move the camera for focussing in macro work. Instead, here it allows me to position the camera lens on the nodal point so that I can easily create a stitch.
The cost of this setup – Novoflex L-bracket £69, Q-Mount £49, Focus Rack £7.30 – yes less £8 from Amazon (here is the link). I will also reveal that I have an even cheaper option for an L-bracket which is only £20, but I am waiting for that to arrive before I get peoples hopes up.
So, does it work? Yes it does and is much easier to work with than my larger and heavier panoramic head. I was able to carry this set up around all day (10 miles on day 1 and 8 miles on day 2). The only difficulty I had is in finding the nodal point. I needed to have worked this out prior to venturing out but because the focus rack only arrived when I was leaving the house I couldn’t and needed to guess instead. Trial and error seems to suggest the Nodal point for the micro 43 lenses is pretty much at the front element but that might not always be true. Once I have some time I will work it out properly and can then use the scale on the bracket and rack to find it quickly in the field.
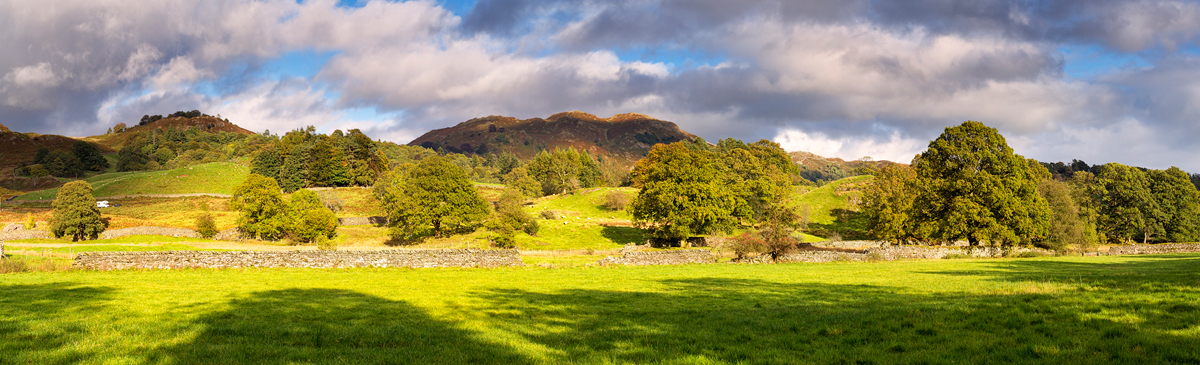
As for the image above, this comprises 7 vertical shots using the 14-45mm lens at 14mm. It also swings through about 120 degrees. When stitched it gives a 17” x 54” print at 300dpi. If I drop the resolution to 250dpi and resize the image slightly then I believe a 35” high panoramic will be possible even if you press your nose to the image.
The stitching aspect of this image was done using Photoshop CS5 and there was very little distortion. I now need to spend some time working with Hugin to see what is possible as I took quite a few sequences with ultra wide angle lenses, as well as having the camera angled down.
The OMD EM5 has superb image quality and this set up allows me to make the most of it.

Robin,
What is/are your ‘ultra-wide’ lenses, please?
I believe that the Pan zoom goes down to 7mm, but has no easy facility for grads. The Oly begins at 9mm, I think.
Also, what range of f-stops would you consider for this type of exposure?
Thanks, and best wishes
Hi Mike,
My Ultra-wide is the Olympus 9-18mm. I am a bit old school so anything wider than a 24mm is ulta-wide for me.
In terms of aperture, I tend to shoot at f/7.1 or possibly f/8 depending how low I am. At standard working height I have my focus point about 5-10 feet in front of the tripod. This is usually enough at f/8.0 for this type of shot. If I get near to the ground with something in the close foreground then I might go up to f/11.0. My prefered approach however is to use focus stacking if I can. For that I tend to shoot at f/6.3 of f/7.1. I find these to be the sharpest settings with my Olympus.
Hope that helps
Robin
This is actually a smart setup. Hey man you like light cameras? Sony A7R!
Thanks. I find it more flexible than a full panoramic head but it’s limited to single row stitching, unless there isn’t any foreground. I thought about the A7R but I don’t like the E-mount lenses. They are a limited range and I thought they weren’t very sharp when I had the NEX. I have my eye on the Sony RX10 when it comes out. It just reminds me of the Sony R1 I had. If the lens on the RX10 is anything like as good as the R1 I will be so happy. Keep up your great work as well.