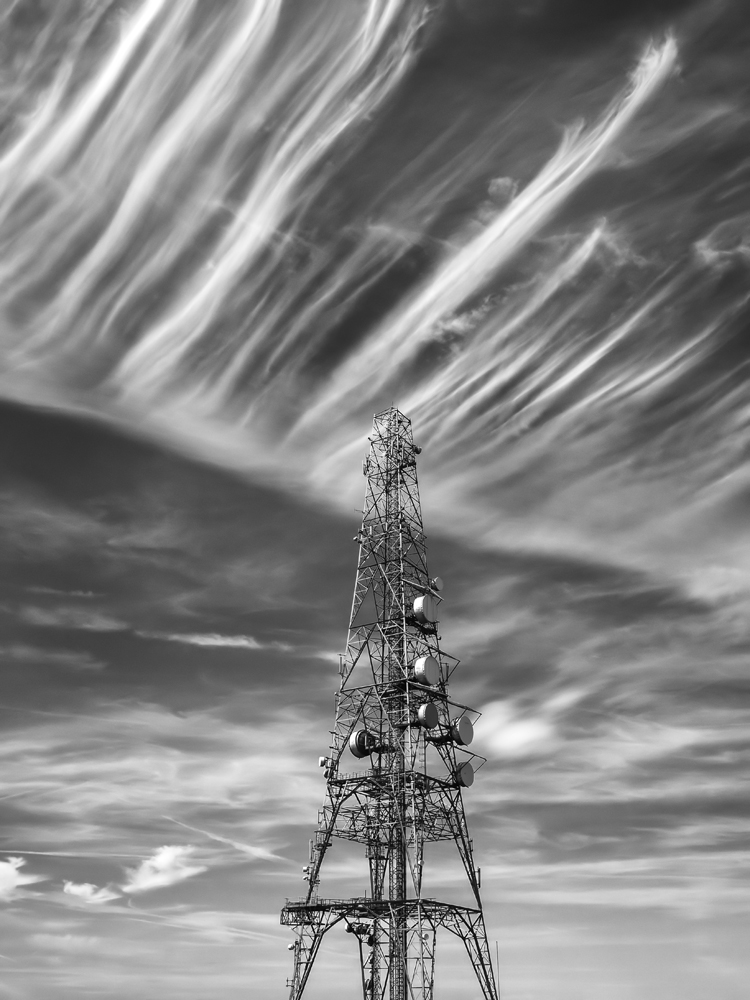
Today I wanted to share another of my images from my moorland walk at the weekend. This particular image is of the transmitter mast located on top of the moors and is backed by a superb sky. I captured the image on my Olympus OMD EM-5 using an Olympus 9-18mm lens at 18mm. I didn’t use any filters (except for a clear glass lens protector) and the image was converted to black and white using Nik Silver Efex Pro 2. In creating this image I learned (or relearned things I had forgotten), a few points that may be interesting to you:
- The Olympus OMD has either has no Anti Alias filter or a very weak one (I suspect it’s the latter). As a result the images are incredibly sharp in comparison with my Panasonic GX1.
- The Olympus 9-18mm lens is also incredibly sharp, or at least my particular lens is. It appears to be sharper and better at resolving detail than my Panasonic 14-45mm when also used at 18mm.
- The OMD isn’t noise free. I have seen lots of claims that it is but don’t believe them. Even at ISO200 (its base ISO) there is noise but it appears to be mainly luminance noise and very high frequency. This means the noise is hard to distinguish and it looks pretty much like extremely fine film grain.
- You don’t actually notice the noise in the images until you use something like Nik Silver Efex Pro 2 and its structure slider. When pushed hard this seems to highlight the noise. To be fair to the Olympus it is much better than any of the other cameras I have used, even the 5D. The 5D suffered (perhaps suffered is too strong a term) from Low Frequency noise that could be accentuated by darkening the blue channel during B&W conversion. I prefer the Olympus.
- If you are converting your image to B&W pass it through noise reduction software first, even if your think there isn’t noise present. You can achieve great quality with no noticeable noise by doing this. The resulting image will then withstand any enlargement much better.
- Nik Sharpener Pro is a super sharpening solution (my favourite had always been Focal Blade). Using the control point tool I was able to target the sharpening on the mast but leave the sky untouched. Trying to do this conventionally using layers and masks would have been very time consuming.
- Using Nik Sharpener Pro I was able to target different areas of the sky to avoid sharpening it. I could then also adjust the Local Contrast and Structure sliders to produce a more natural look to the sky.
- When I printed this image on an Epson 3880 I set the print driver to use Epson ABW mode. Within this I was able to set the level of “darkness” for the final print. This offers the levels “Dark, Darker and darkest”. In the past I have followed the advice to set the driver to “Darker” but this time I set it to “Dark” and the results are better. If you are using an Epson printer with ABW mode it may be worth experimenting with this. If you use another printer make try experimenting with the driver.
Hope you like the image.

You’ve captured Chemtrails. Congratulations.
What on earth are Chemtrails?