
I have now been shooting with the Fuji X-T2 for a couple of months. Whilst I have only had a few outings, I’m very pleased with the results. I like the handling of the camera and also the lens quality despite a couple of problems. In fact, the 10-24 and 16-55 lenses are nothing short of exceptional.
There is though one problem that has niggled me for a while and this is the “Wiggly Worm” pattern. You tend to find this in areas of fine detail when converting RAW files using Lightroom or Adobe Camera RAW. This is a real shame, especially as I use Lightroom for much of my cataloguing and image management.
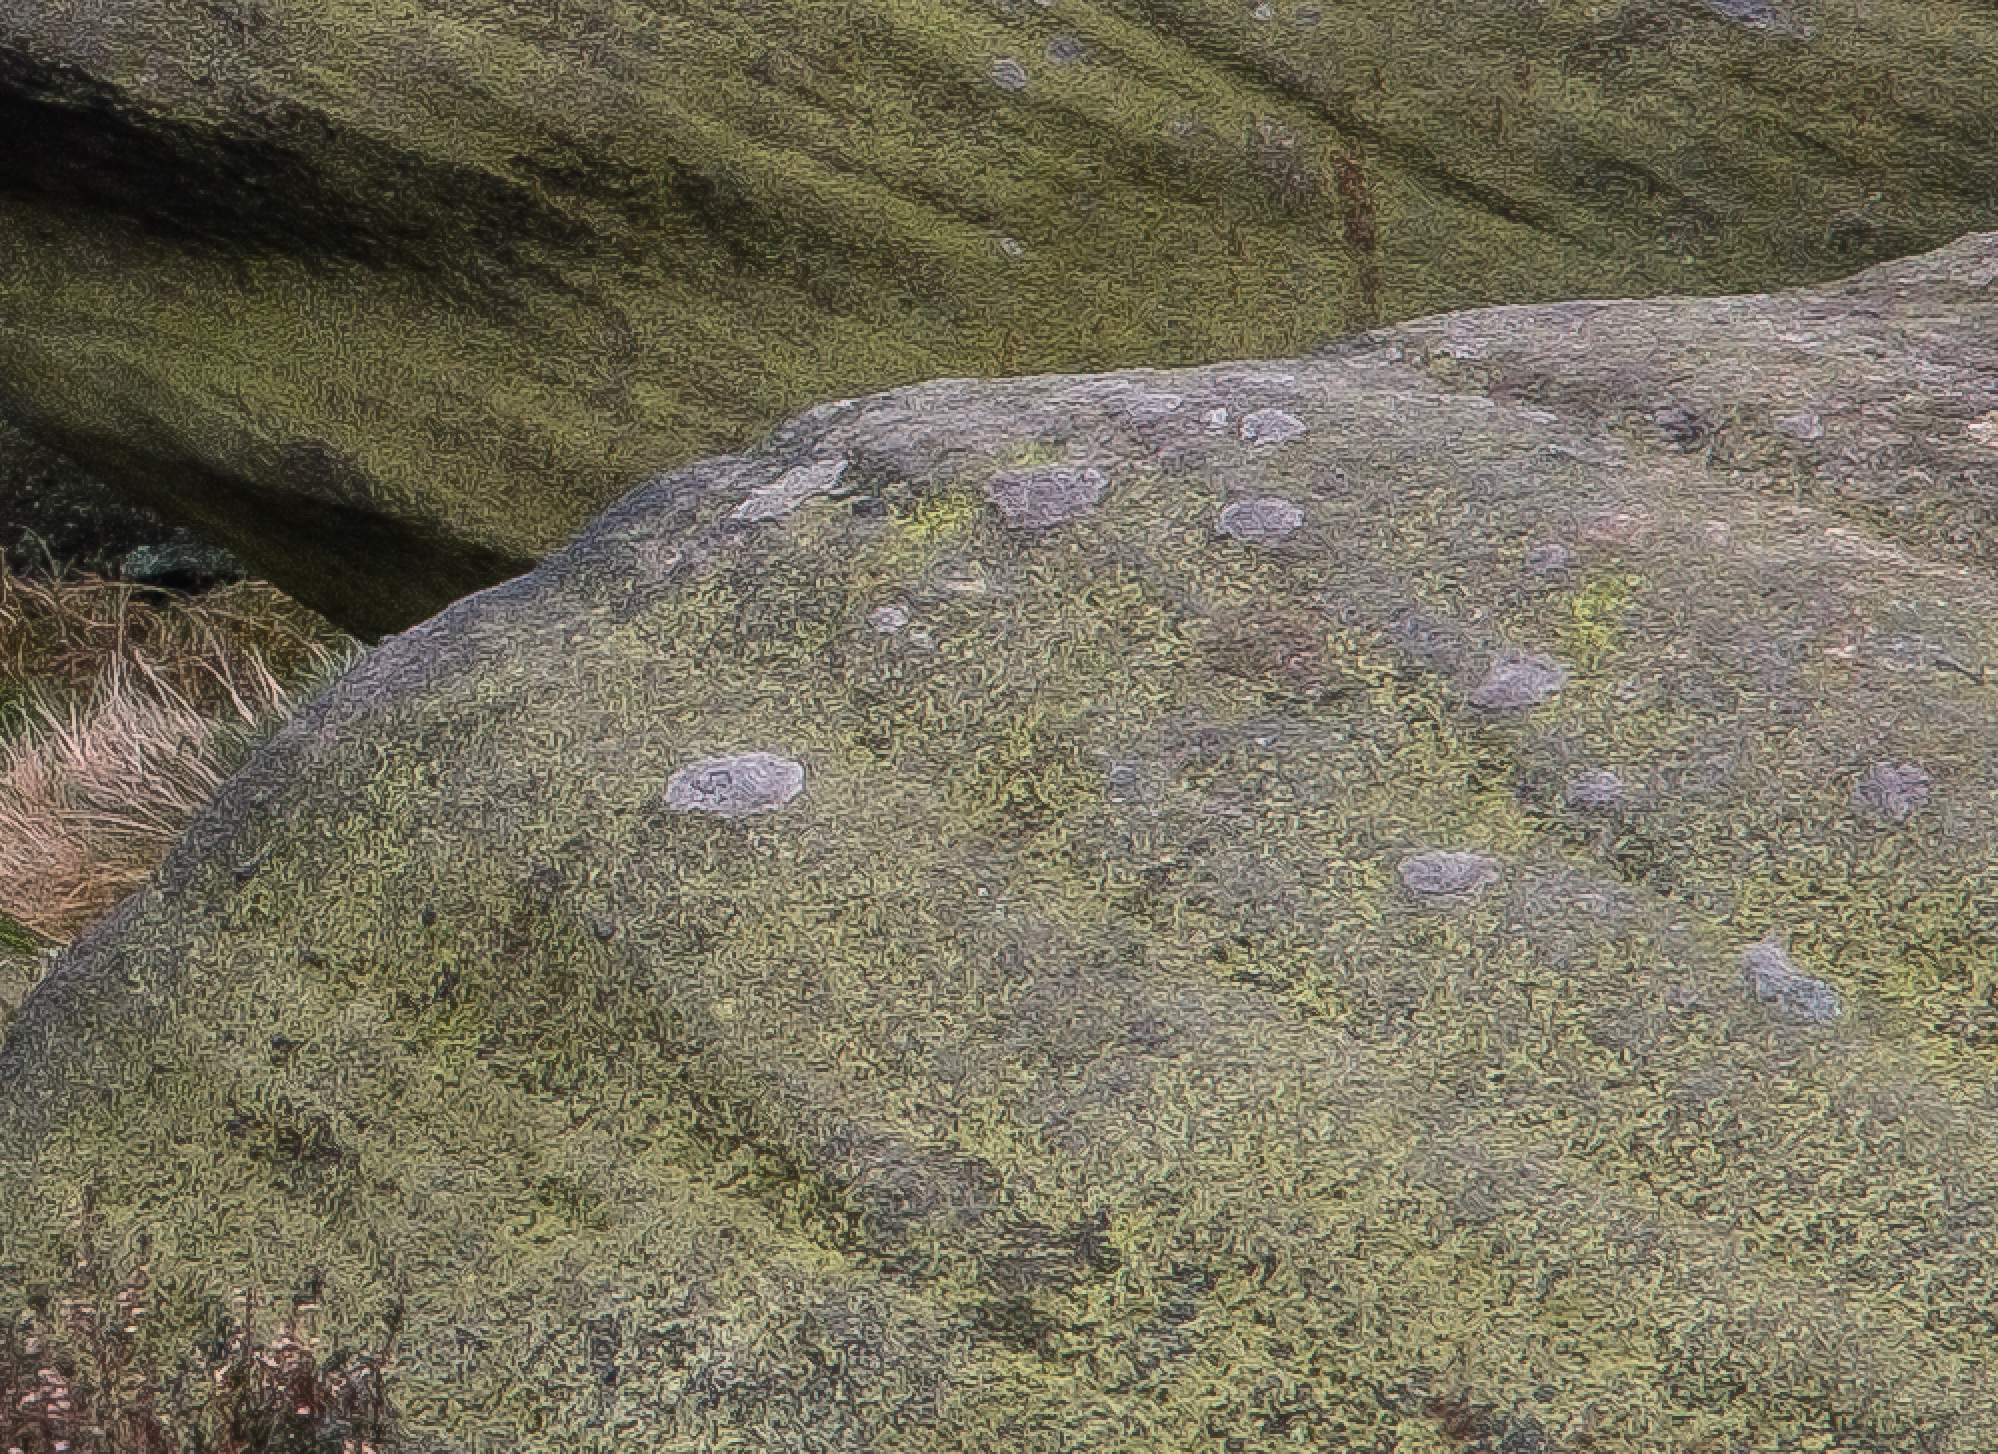
To illustrate the problem, a look at the image below which has been magnified at 2:1 in Lightroom; you may need to double click the image to open it at full resolution (I was also running my Mac at 2048 x 1152 when I took the screen shots so this will magnify the image further).
I can easily avoid the problem by switching to Iridient Developer or RAW Therapee but I like working in Lightroom. I have therefore been looking at how to reduce the “Wiggly Worm” effect and I think I have hit on something.
I had originally put the effect down to the demosaic routine that converts the RAW file. But I have changed my mind and now think it’s the sharpening routine that creating much of the problem. The example I showed above was created using the default Lightroom Radius setting of 1, an Amount setting of 45, a Detail setting of 75 and Threshold of 10. The culprits that seem to exaggerate the problem are the Amount and Masking sliders.
Masking causes the sharpening effect to be concentrated onto the edges in the image. Only when the Masking is set to 0 is the entire image sharpened. The “Wiggly Worm” effect seems to be created when the edges in areas of fine detail become exaggerated. Effectively the edges are becoming over sharpened, which is why the Amount slider has such an impact on the result. You only need to increase it slightly and the effect is emphasised. The Detail slider has less of an effect because it sharpens only very high frequency details.
So, what does this mean and how can you use it?
Limit the sharpening applied in Lightroom. Here is the same example but sharpened using much less aggressive settings.
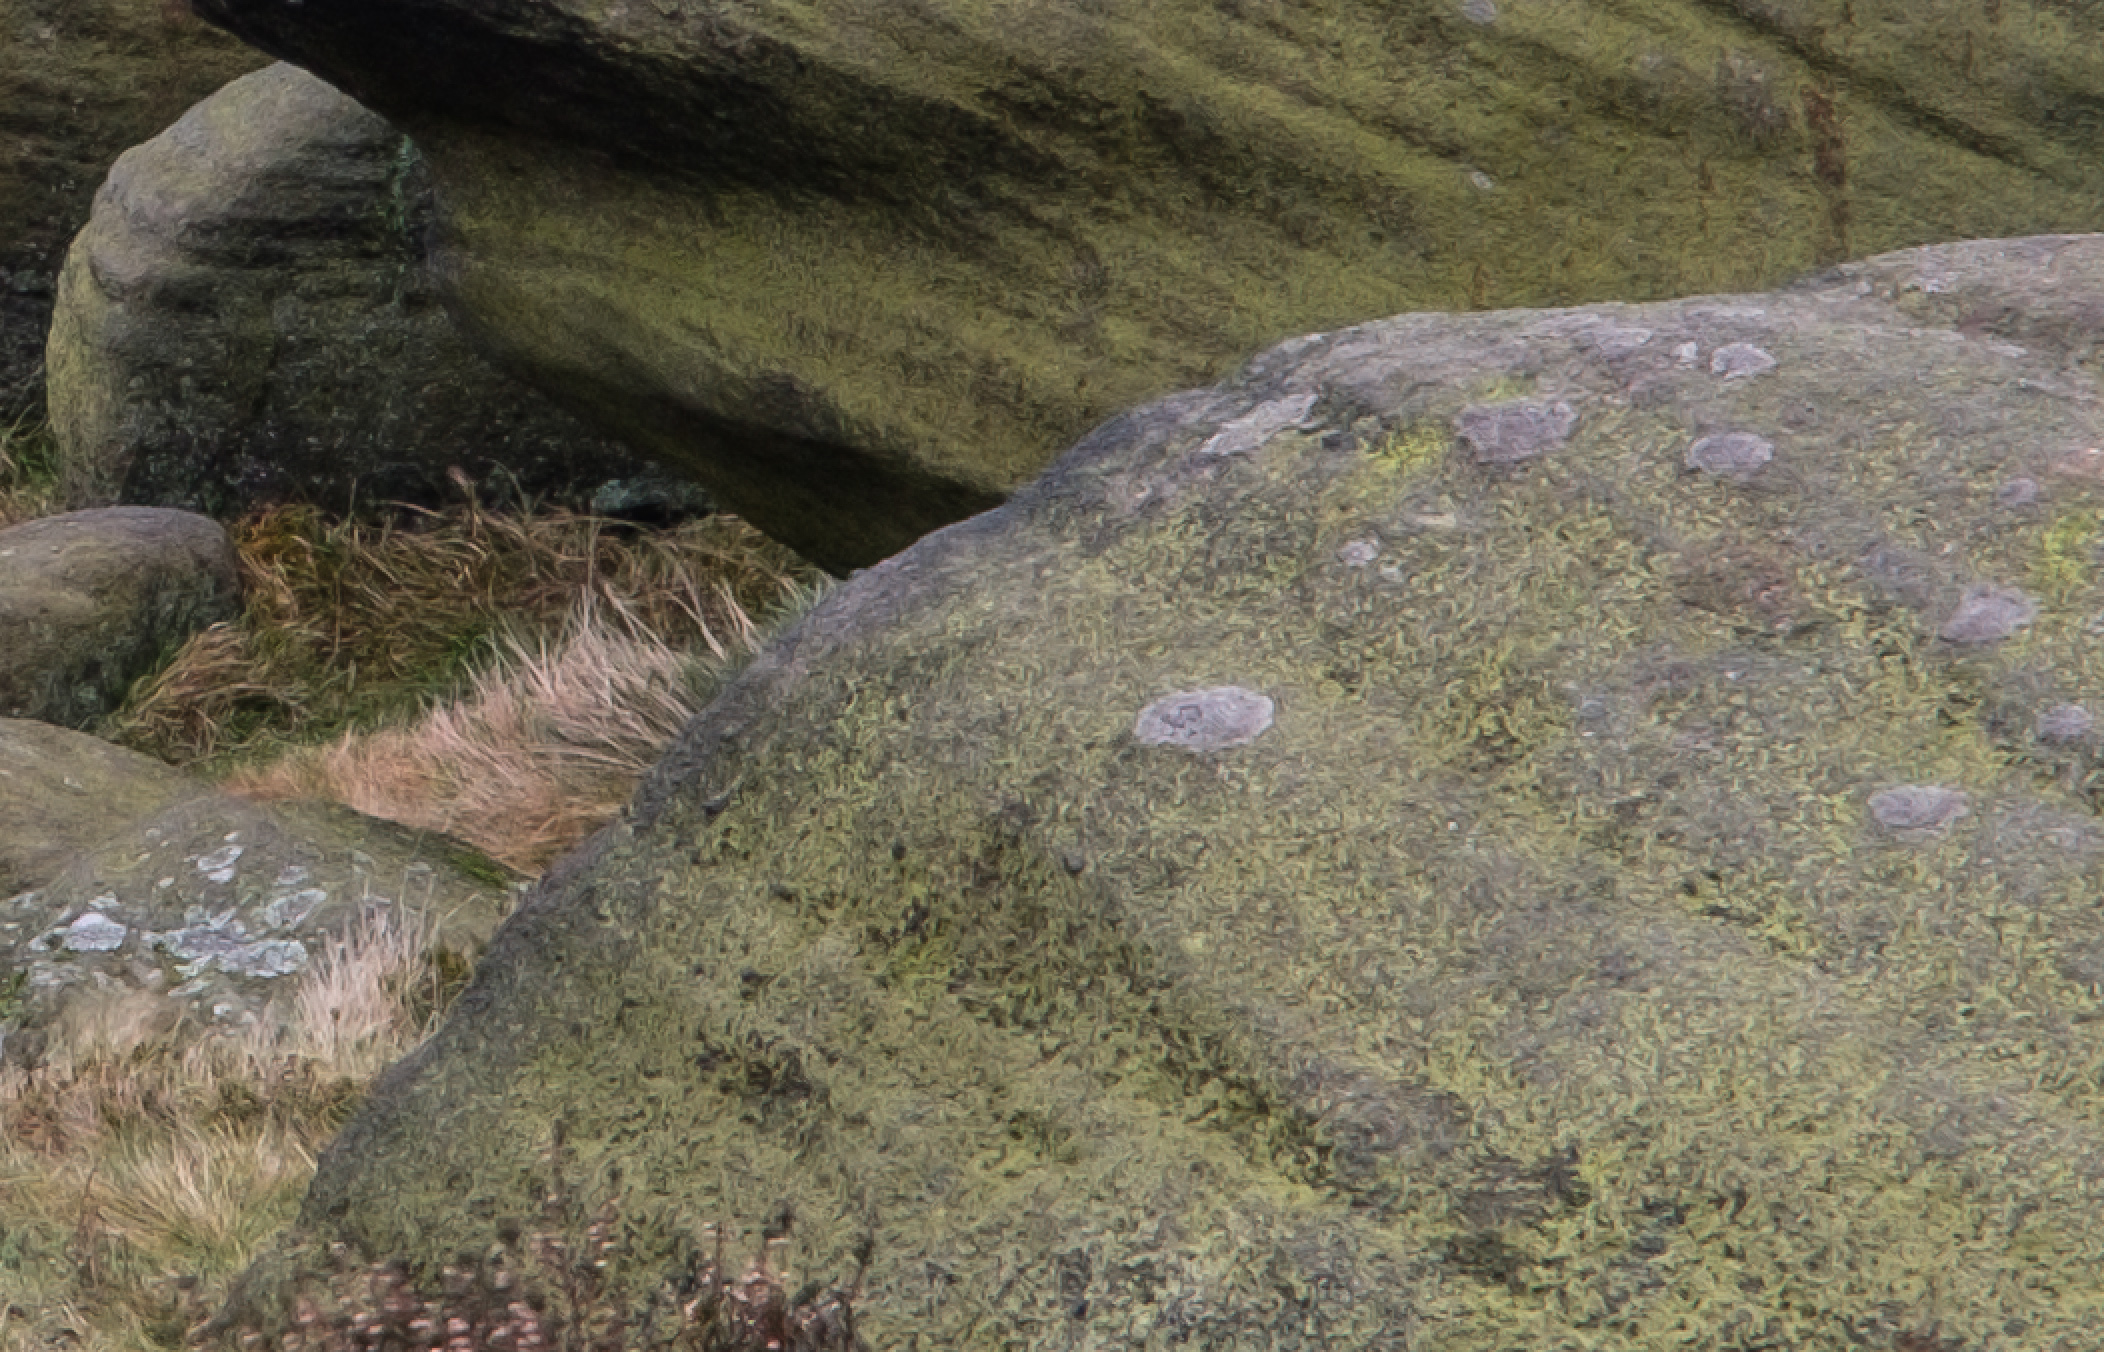
This used the settings or Radius = 0.8, Amount = 30, Detail = 30 and Masking = 0. The image is a little softer but much more natural.
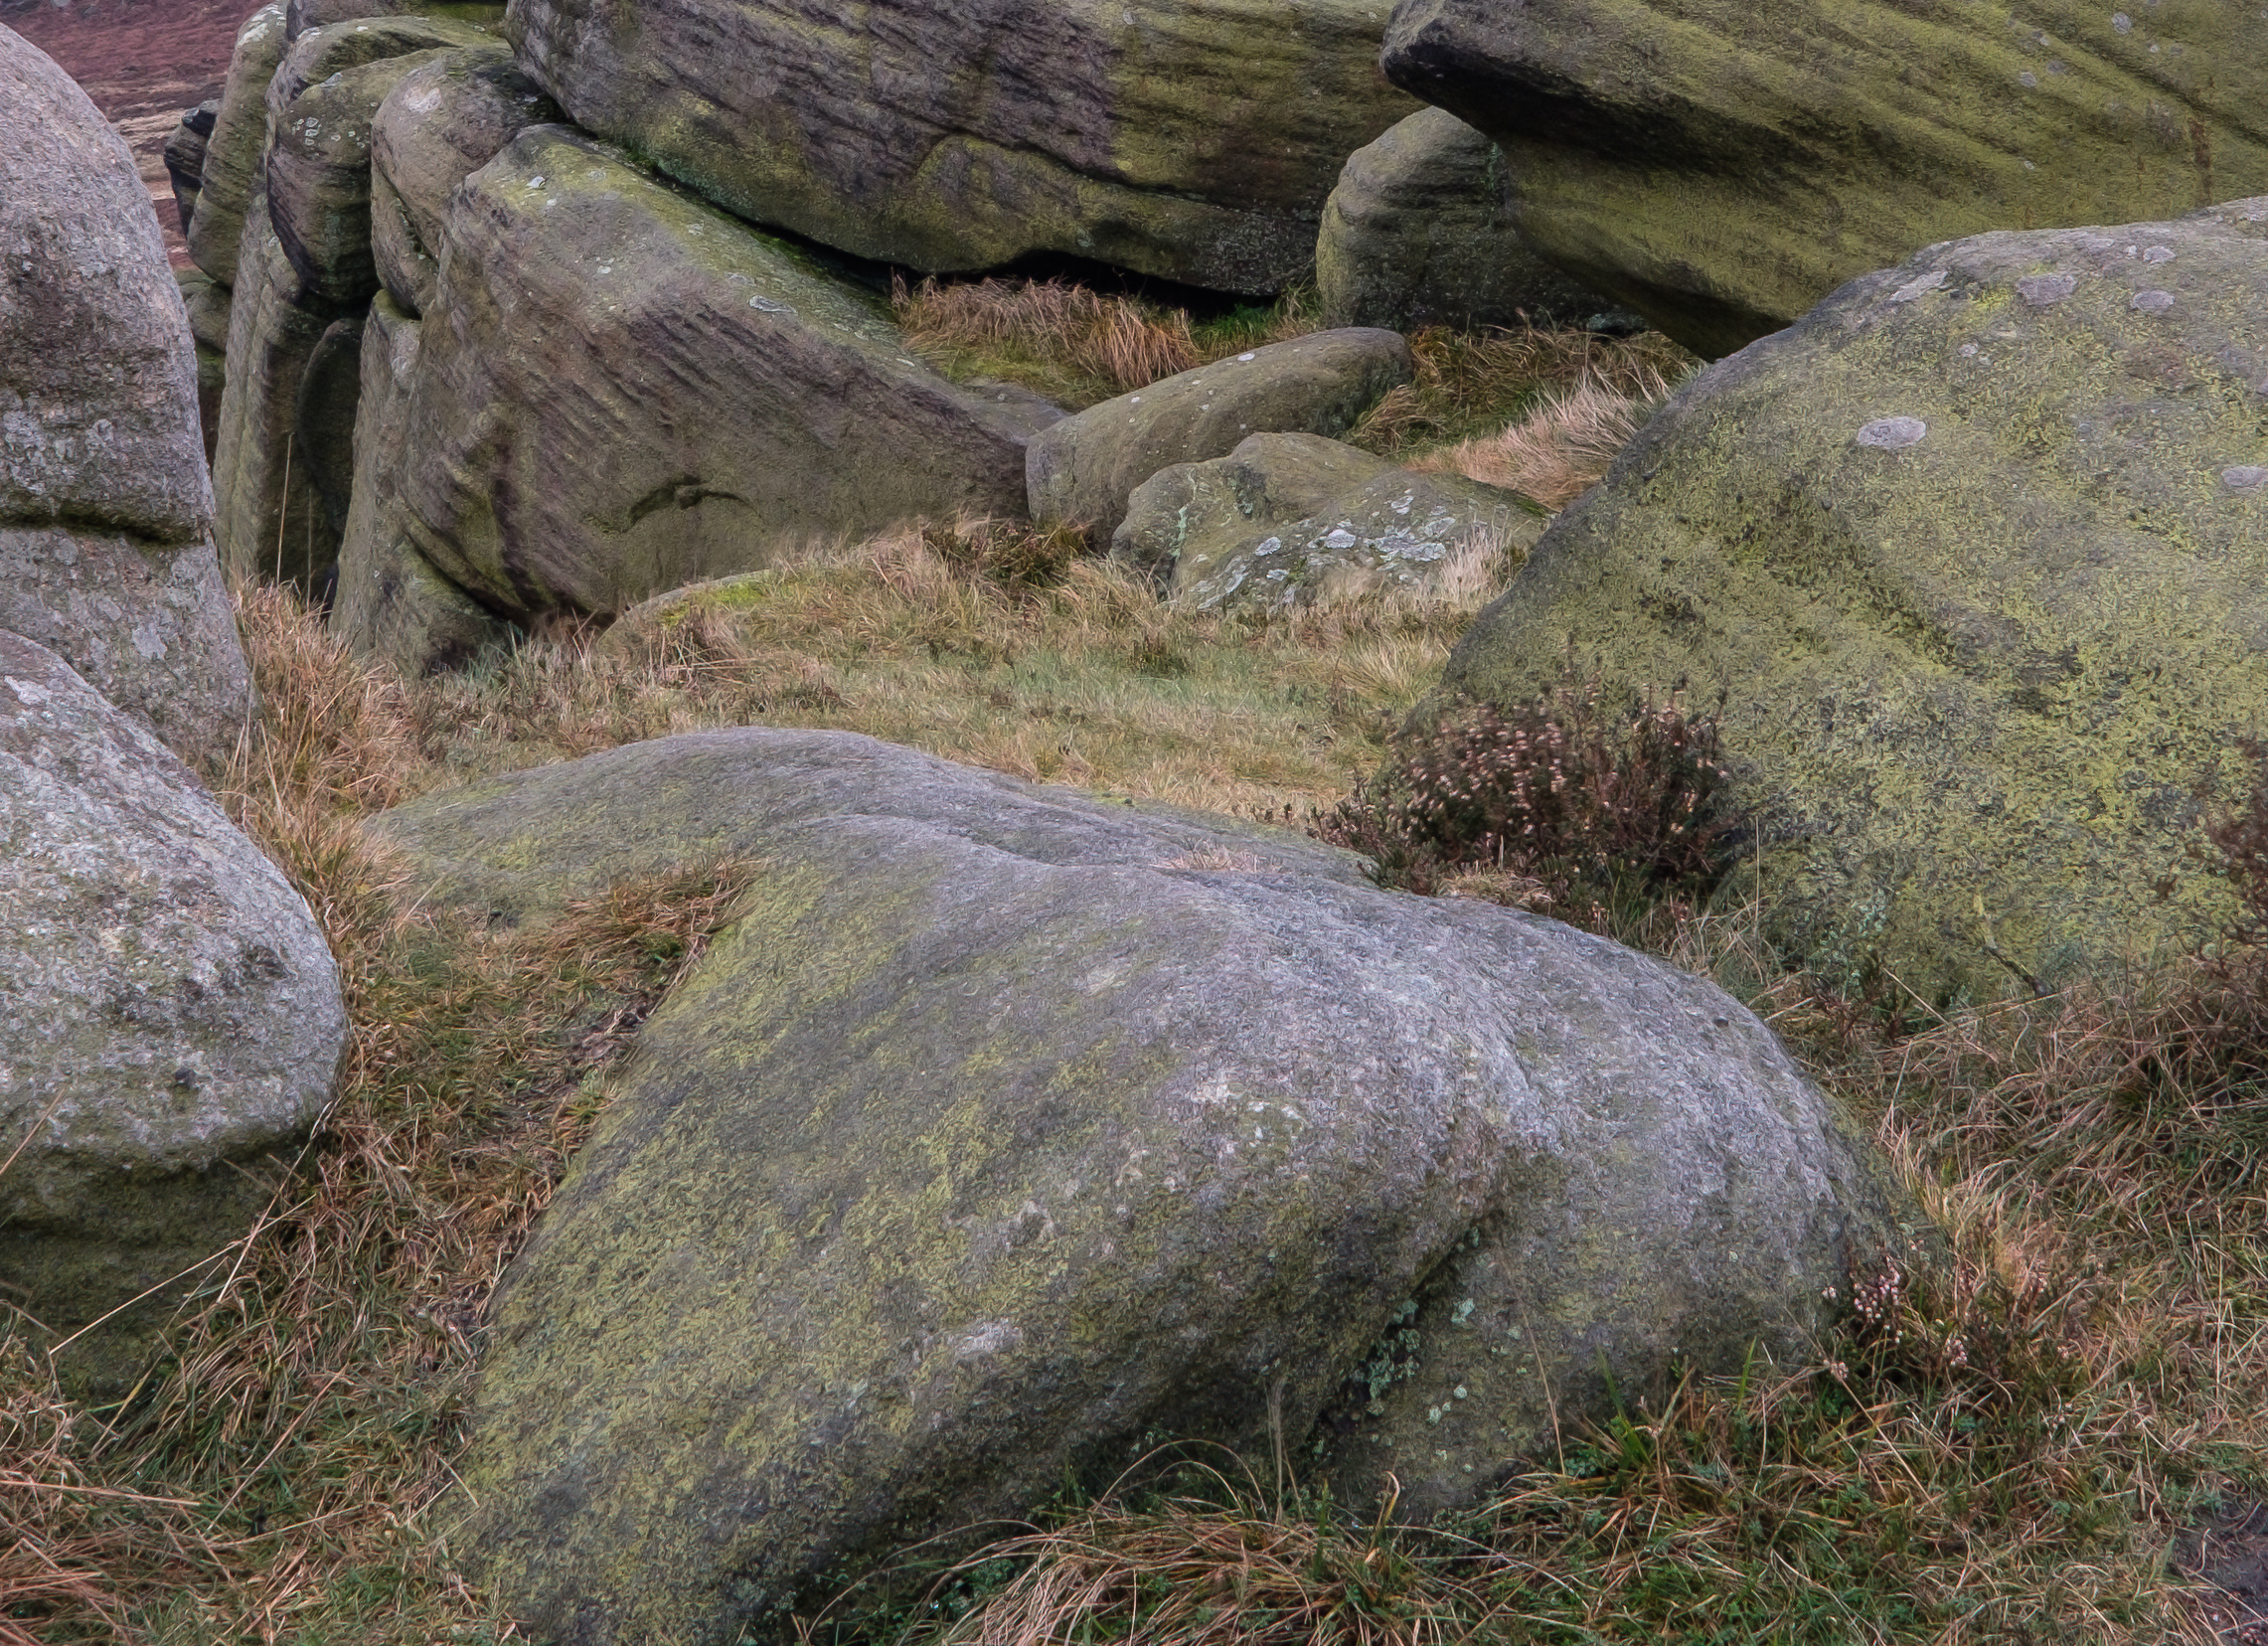
Following this approach, I have found I can minimise the “Wiggle Worm” effect whilst producing images with greater detail. Although the images coming from Lightroom are slightly softer, they respond so much better to additional capture sharpening using Nik RAW Sharpener or Photoshop Smart Sharpen. You can see a further example here viewed at 100% magnification.
You may now be wondering why bother with Lightroom capture sharpening at all and simply apply Capture Sharpening in another tool. Well, I tried this and to my eyes at least, a small amount of Capture Sharpening in Lightroom seems to produce better results when sharpened a second time outside Lightroom.
But does all this pixel peeping matter? My answer to this question is yes and no.
If you are going to be displaying your image on the internet, then you will most likely be down sampling them. The act of down sampling will remove some of the “Wiggly Worm” effect and can even remove it completely depending on how much you reduce the image size. If you are going to be printing the image, the softening effect of printing will also remove the pattern. For these reasons, I say that it doesn’t matter.
Where this effect does cause a problem, is if you are submitting your images to others for inspection. A typical example might be when you submit images to a stock library for sale. Here they probably will pick up on the pattern and might well reject the images.

I do appreciate all your comments about photography in general and your books and videos are really excellent. For the life of me, however, I just cannot understand all the effort and time you put into this Fuji camera. It seems you continually find issues with it while in the past you have shot with an Olympus with great results. I must admit it gets somewhat tiring hearing about all the issues with the Fuji cameras whereas Olympus seems to have made tremendous progress.
I understand but its the perfectionist in me. I also like the challenge.
Thanks for showing this I will keep my eye out. Though I use smart sharpening in Photoshop and intensify pick from MacPhun for detail extraction.
No problem. You just reminded me that I really need to take a look at MacPhun.
what about the new on1Photo Raw I know they are still working on it but I have now purchased it
and all I can say it looks relay promising.
Also what about the brand new Affinity Photo by Serif built from the ground up
this also looks promising.
my main reason for using them is to get AWAY from Adobe software altogether,
as I feel they have ripped of the LR users, just look at there update procedure if you don’t buy the cc/version then you don’t get the same updates.
Thanks for your review. I do hope you will consider the above programs
Tom G
Thanks for the comments. I didn’t really want this to turn into another RAW converter evaluation but rather keep it to avoid some of the problems with Lightroom. A lot of people including myself would like to keep to Lightroom, but I appreciate your point. I have a lot of time invested in the asset management side of Lightroom that I don’t want to lose. I have tested quite a few converters including Affinity, Darktable, Iridient, Photo Ninja, FinePix, Capture One and my favourite for image quality, RAW Therapee.
https://thelightweightphotographer.com/2016/10/25/another-raw-processor/
https://thelightweightphotographer.com/2016/10/10/new-raw-developer/
I have also checked On 1 Effects 10.5 and whilst good, it lacks the lens profile correction. I’m hoping Photo RAW corrects this and am looking forward to 19/12 when its released. I paid for the upgrade a long time back.
You are exactly correct in the nature of the sharpening issues with 6×6 matrix Fujifilm pattern. It is also something of the tip of the iceberg with Adobe software maths with respect to the new Fujifilm color filter array pattern (2×2 to 6×6 matrix processing in a huge leap in power and sophistication requirements)
Adobe long ago optimized their software for Bayer 2×2, with a built-in biasing control for sharpening that later developer softwares have avoided by using more recently developed maths of greater sophistication. The relatively simple maths approach that can be used with Bayer array is also very easy to over process Fujifilm sharpening with Adobe products. This produces the infrequent, but well know “water color effect’ of Adobe products when developing the Fujifilm 6×6 color pattern.
However, this is more than strictly a sharpening issue or a Fujifilm issue. The “water color effect” is one of four ways demosaicing any pixel array may break down. The earlier, less sophisticated maths used by Adobe were not intended to perform with larger than 2×2 array patterns, while maths being used by newcomer venders are able to do so with relative ease, hence the better performance of the more modern, but less popular softwares.
Apparently, the age and programming methods of Adobe software products are such that an quick transition to more effective applied maths of greater sophistication has either proven too expensive or not at all possible. For the professional work flow, Capture One seems the most complete of the newer software. Silkypix, which does not have specific workflow enhancements, has an exceptionally good grasp of Fujifilm RAW, along with the sever other softwares previously mentioned.
Thanks Mike. This does make sense and I suspect its something that Adobe won’t get away from for a long time if ever. Having said that, RAW Therapee does a cracking job of translating the Fuji RAW files and even has a specific routine for them. Given this is open source and maintained by enthusiasts, you would think Adobe could match them. I suspect I might need to revert to Capture One once more.
In all the years of using lightroom I’ve never heard any mention of the sharpening masking slider doing anything other than reducing sharpening in low contrast areas. Never any mention of it concentrating any sharpening at the edges at all. I guess maybe it could by reducing sharpening near to edges but no implication of any increase in sharpening. Maybe just an implication based on the wording you chose and my understanding of it but from my understanding the masking slider should do nothing but reduce worms, if any.
Sorry if I wasn’t being clear. The Masking slider just creates a mask so that sharpening is restricted (perhaps concentrated was a poor choise of words) onto the edges. As for it reducing the wiggly worm pattern, it doesn’t appear to. When I use this slider it appears to create a pattern in the image. I can’t explain why but it may relate to the comment from Mike Shields above.
I bought the Fujifilm X-T2 exclusively because of these worms, I love ’em!
You can probably seek therapy. No seriously as much as I dislike them, I think when processed correctly they do add to the apparent detail and sharpness in prints. I just can’t get used to looking at them at 100% magnification. The fuji cameras are great though.