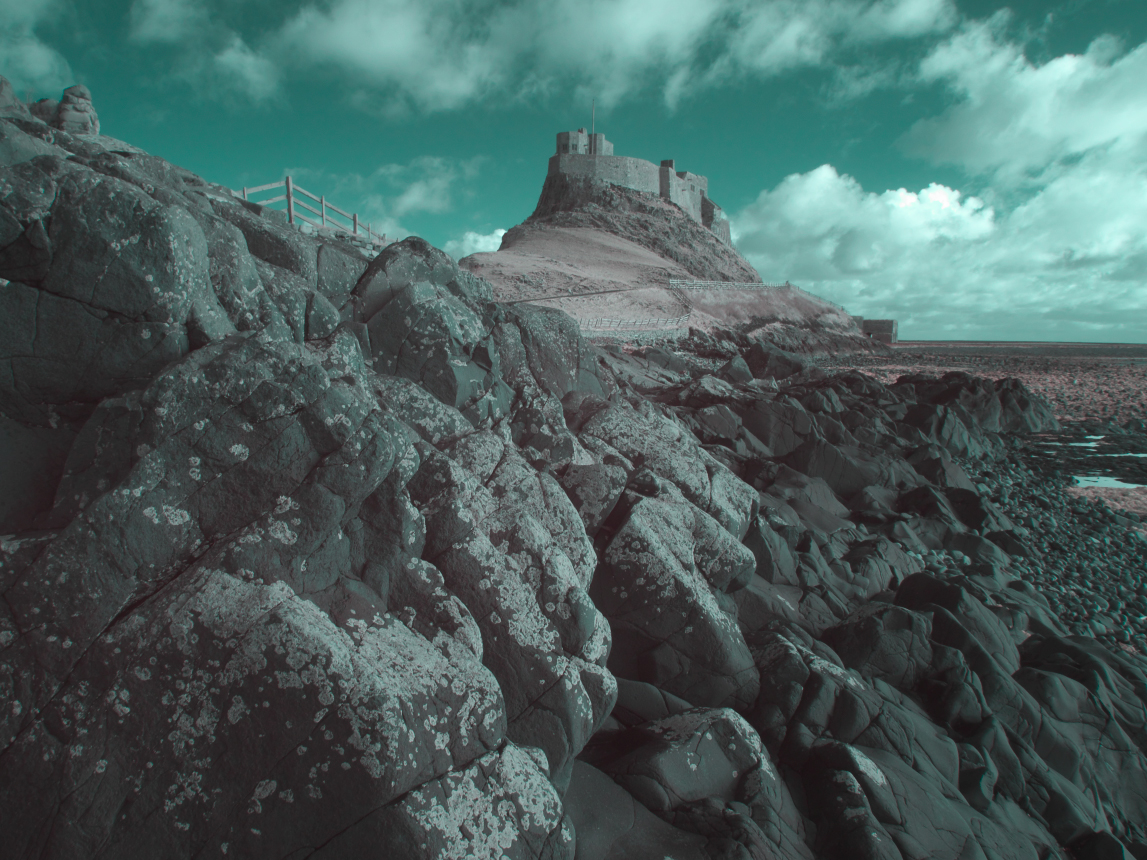
I have just answered a question posted on yesterdays blog and it made me realise I am missing the obvious again. This time it was that most people reading my blog have probably never seen a direct conversion from a RAW infrared file. Neither will you probably know what all this problem is with white balance and why I was so concerned. Here then are some examples that hopefully will put this right. All are created from the same RAW file used for the image at the top of the page and I have done no other adjustments to the files beyond what I explain below.
This first example is what you get in Lightroom when you set the camera white balance to AWB and all the other sliders are at 0.

The next example shows what you get in Lightroom when you set the camera white balance correctly for infrared light. Better but still not correct.
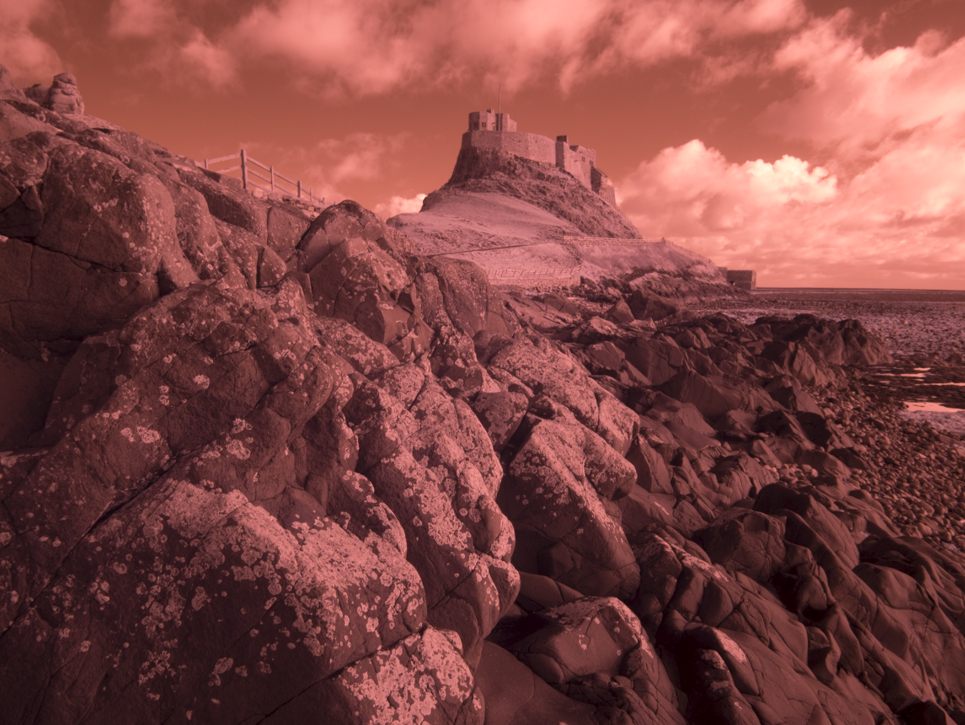
Here is the same RAW file in SilkyPix using the correct Infrared white balance. Notice the difference in colour from the Lightroom image. In this image there is much more information in all three colour channels and it makes for a better conversion to black and white.

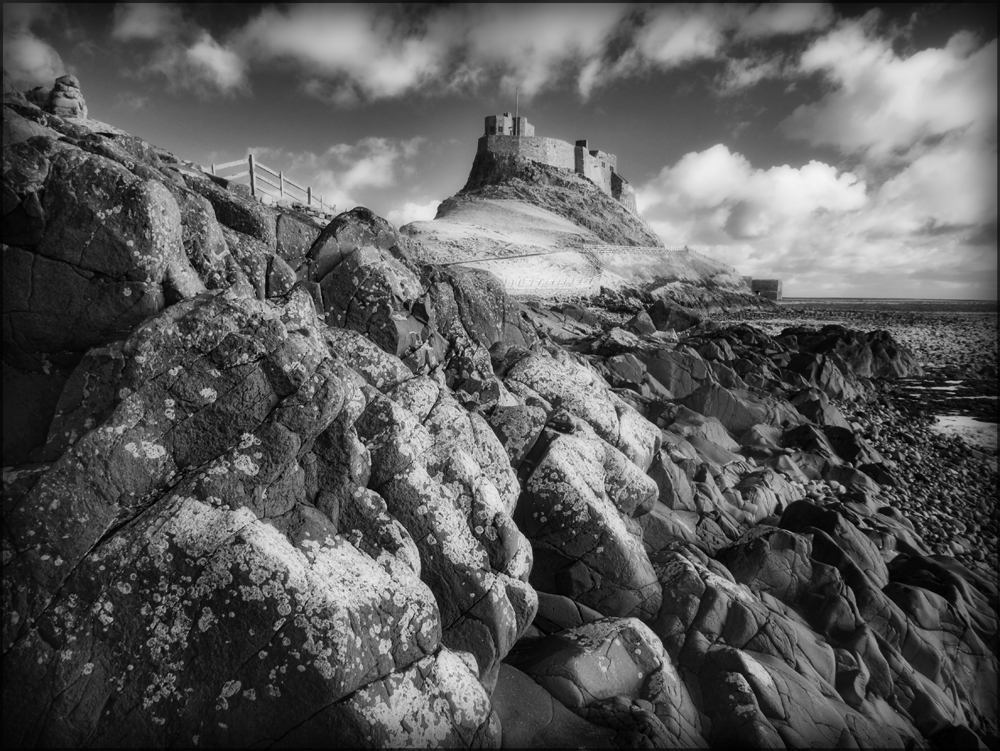
The next example shows what happens in SilkyPix when you set the white balance using the white balance picker on the grass near to the castle. This is how the file should look before converting to black and white. This gives a nice spread of information in all the channels and makes for a high quality conversion. Even though a lot of the information in the B and G channels is probably interpolated by the RAW converter, it still appears to be a better conversion and that’s what I am interested in.
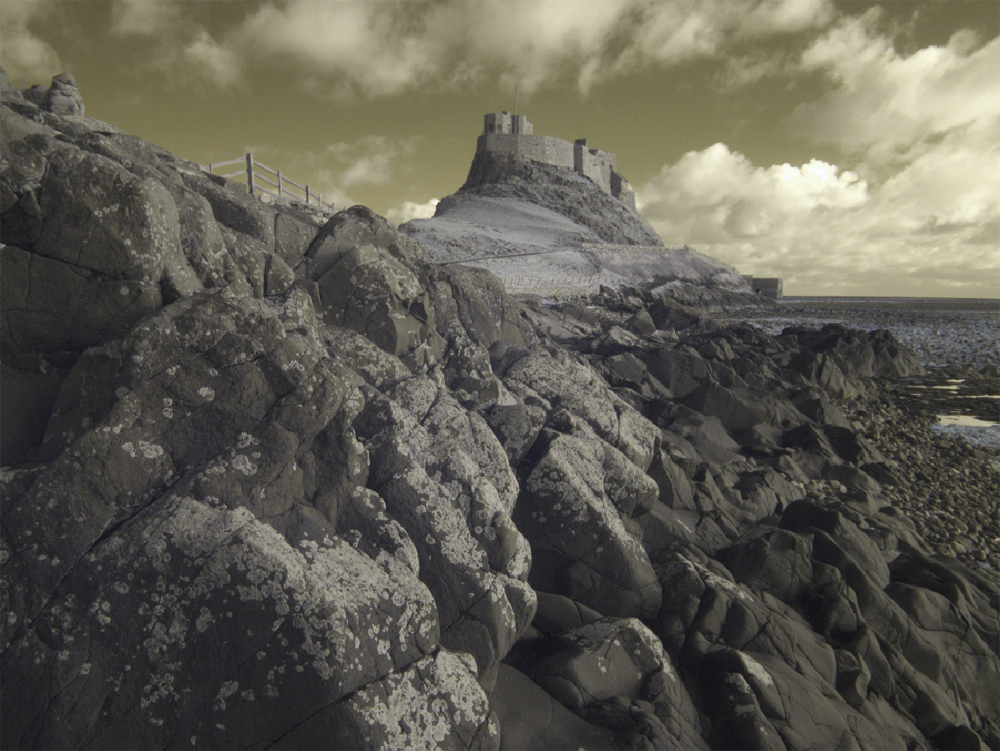
In this final example, I have done a channel swap between the Red and Blue channels to create a false colour. Not to everyone’s taste but it can be quite effective.