Earlier in the week, I headed to the Peak District for some landscape photography.
I love this time of year for photographing the landscape; at least I do when it isn’t raining. But if it’s cold and frosty, the conditions can be excellent. Sometimes, the cold weather will bring a freezing fog, but on other days, it will produce what I call clean light. And so it was on this particular morning.
I arrived at the parking around 15 minutes before sunrise. This might not seem like much, but I had two reasons:
- The location wasn’t more than 300m from where I parked the car.
- The area is quite low-lying compared to the surroundings. The sun must climb a little in the sky before reaching the ridge on the horizon.
When I arrived, I already had a shot in my mind that I wanted to capture and went for that first. After I was in position and had fired off a few test shots, I noticed the colour in the sky was building. I checked my watch, and sure enough, it was sunrise, although the sun hadn’t yet come into sight. Then, after a further 10 minutes wait, I captured the shot I had come for.

This is a 1/6 second exposure with the XT5 camera mounted on a tripod. I used a Fuji 10-24mm lens at 10mm, an aperture of f/8.0 and ISO125. I also had a 3-stop reverse grad neutral density filter over the sky to help balance the exposure.
What pleased me most about this shot was that I had waited almost five years to capture it. I first visited this location at sunset in January 2019 and realised it had a lot of promise. After that, the conditions were never quite right to produce the clarity of light and colour that I wanted. That is until now.
But finally capturing this scene in great light wasn’t the end of it. Nearby was an old Silver Birch tree that I had photographed many times. That also held great promise but had never delivered. Finally, my perseverance paid off, and I captured this photo.
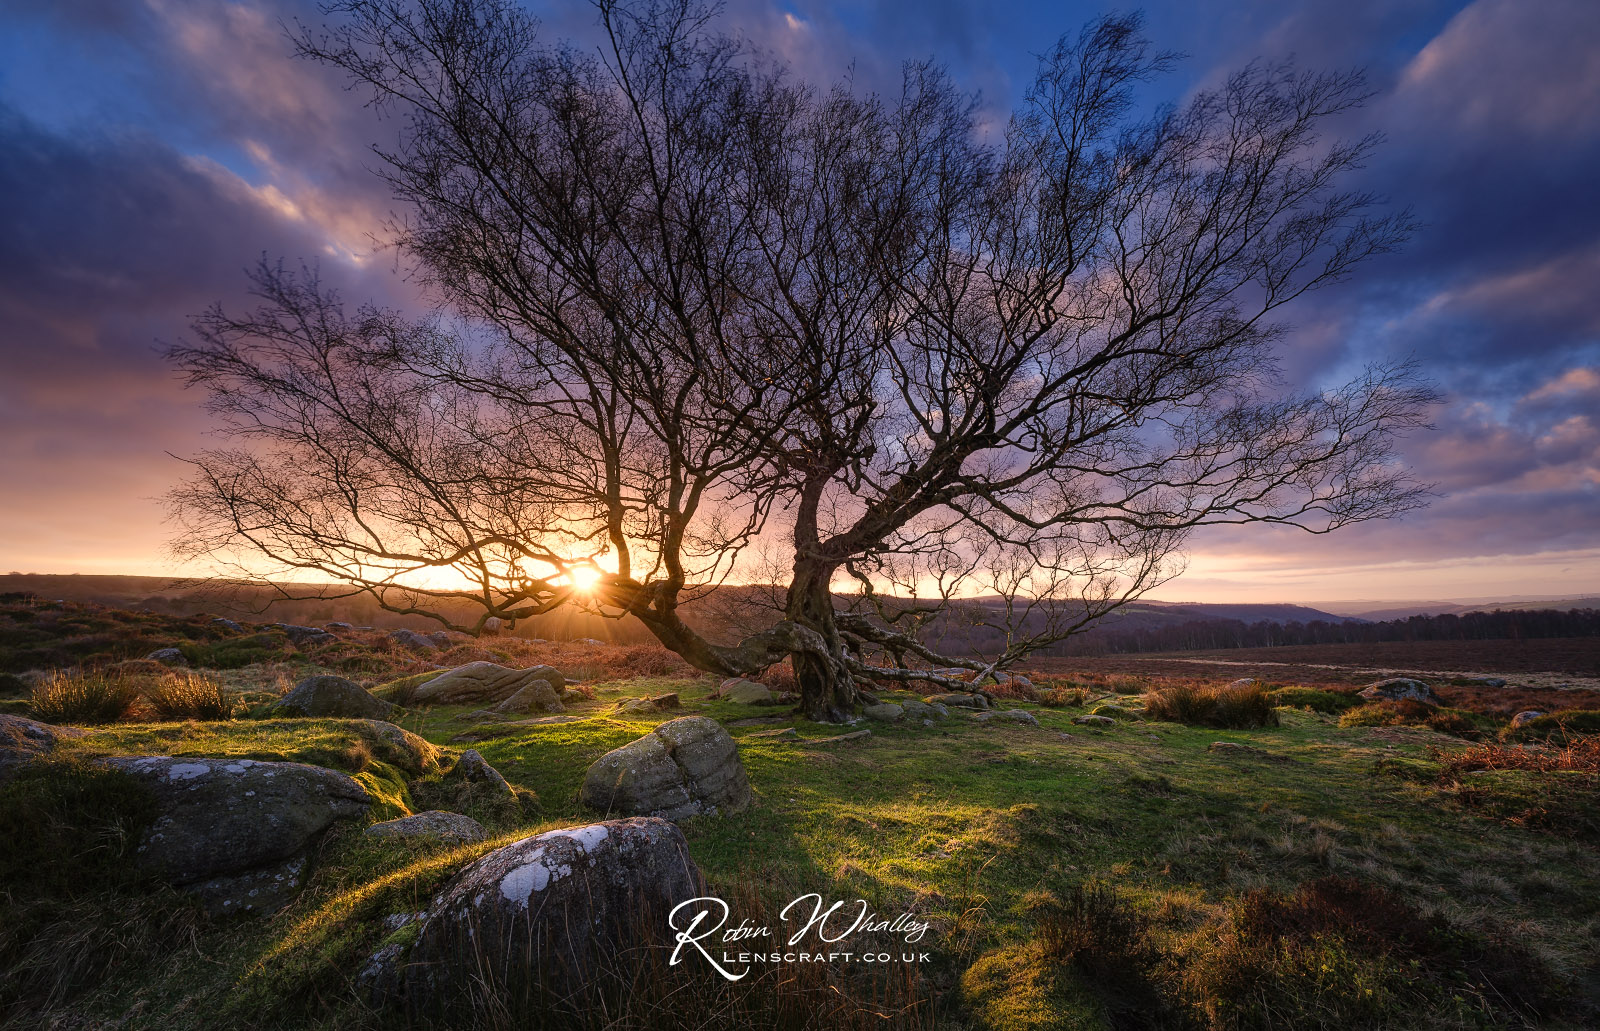
This was captured using the Fuji XT5 and a Fuji 10-24 lens at 10mm. The camera was mounted on a tripod for a shutter speed of 1/15 second at f/7.1 and ISO125. I also used the 3-stop reverse ND grad filter on the sky.
I hope you like this week’s images and have a great weekend.

FYI there are no images. Ive been having the same probl
Thanks, but they show up when I look at the post. I’ve tried several browsers on Windows and a Mac as well as an iPad and iPhone. Not sure what it could be.
Images show for me. And I’m glad they do – both are stunning!
Wonderful images, a fitting reward for the effort. You mentioned in a previous newsletter that you have changed your focus point and f-stop when using the X-T5 to account for diffraction. I have read that the 10-24mm is best at f5.6-f8, as you have done. Robin, would you mind explaining where you focus in this case. Just an aside, the 10-24mm is not on the fuji prefered list for the 40MP sensors but your images would have to question that. I have that combination and am doing an town heritage walk today!
Thanks, Ross
Thanks for the question. It’s a good one.
Yes, I have changed my approach and I now try to use f/7.1 with the XT5. I do have moments where I panic and push it up to f/8.0 but it really isn’t required. The focus point is the key thing. I try to find something around 20m to focus on. I take a test shot and check to see the foreground is sharp. If it isn’t I move the focus point a little closer and continue to check. I know it isn’t scientific but it works great in practice in the field.
As you say, the first generation of the 10-24 isn’t on the prefered list of lenses for the XT5. Something about it not being able to resolve enough detail and it’s recommended to buy the new 2nd generation 10-24. Interestingly the 16-80 lens isn’t on there either but they sell that as the kit lens with the XT5. The 16-80 also isn’t as sharp as the 10-24.
What I’ve found is that both lenses perform fine providing I use the methods described above. My results with them look excellent at 100% magnification so I’m happy. When I was tending to shoot at f/13 I was getting a falloff of sharpness and a lot more distortion around the edges and corners of the lenses.
The other point I would emphasise which I’ve mentioned in this blog in the past is that the results from processing RAF files in Lightroom are at best poor. I now process all my RAF files using either DxO PureRAW or DxO PhotoLab (usually PhotoLab). I then export a DNG file to edit in Lightroom or Photoshop. Using DxO DeepPRIME XD on a Fuji RAF file produces a superb result. Where I’ve seen photographers complaining about lens softness on the XT5 I’ve also seen them using Lightroom to look at the RAF file. I can’t begin to tell you how different the results are when you switch to something like DxO. I also used to use Capture One which produced good results but then it became too expensive so I stopped.
Sorry for the long answer but hopefully it helps you.
Thank you for taking the time on such a comprehensive reply, it is very helpful. In addition to the f-stop, it’s clear now how important the careful selection of the focus point becomes for obtaining the desired depth of field. Setting the camera to manual focus and using back button focus could help this.
Placing the focus point correctly is important. Most photographers position it too close to the camera (me included) and then end up stopping down the aperture to get enough depth of field. If you want to use something like f/7.1 for landscapes you need to be careful of this. I tend to use the single point focus and use the joystick on the back of the camera to position it.