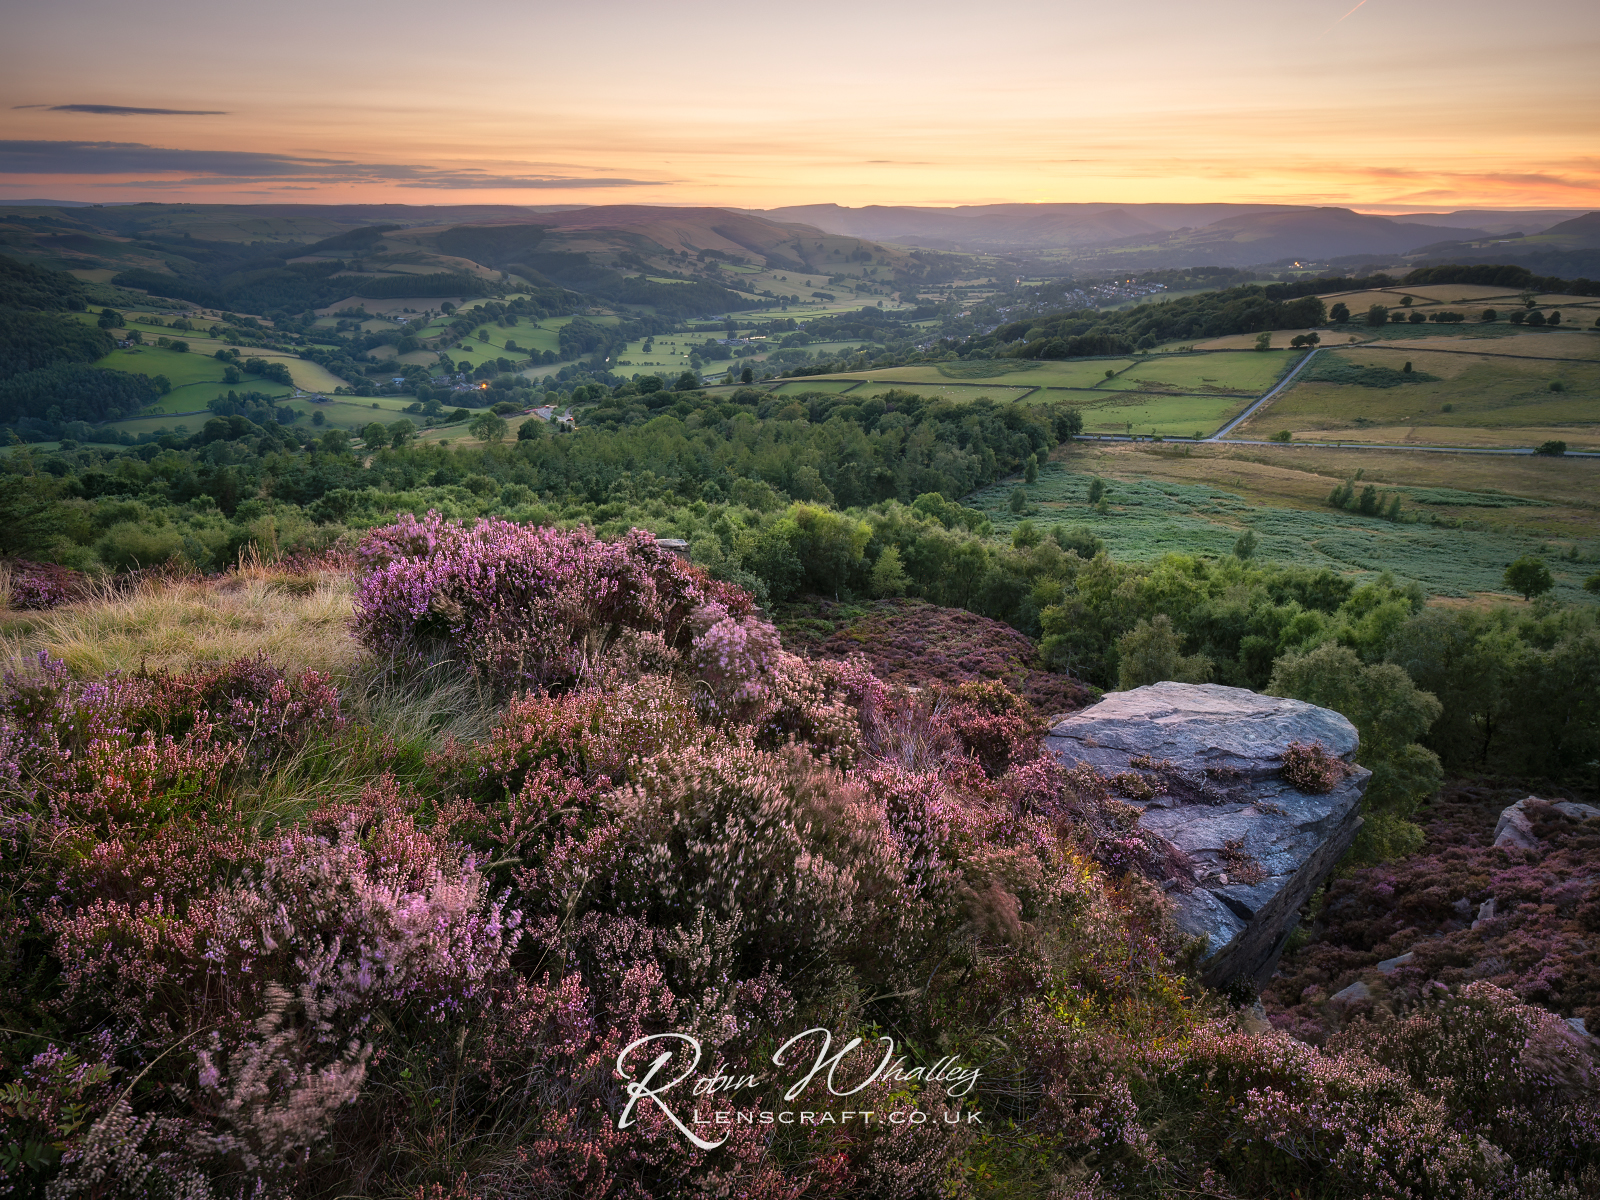
Last week I mentioned that I’ve been doing more work using the high resolution mode of my Panasonic G9. In this week’s post I want to share some of my thoughts about using this for landscape photography. Here’s a recent example from last week, shooting with the G9 in the 80Mpixel mode.
When I bought the Panasonic G9 there were two things that won me over. The first was the discount from Panasonic at the time. The other was the 80Mpixel high resolution mode. I had considered getting the Olympus EM5 MKIII but the high resolution mode on that was limited to 40Mpixels. It also cost more than the discounted Panasonic G9.
Having now owned the G9 for almost 2 years, I found I haven’t used the camera that much, and when I have used it, it’s been in the standard rather than high resolution mode. Recently I’ve found that I’ve enjoyed shooting with the G9 much more. And because I’m using it on a tripod most of the time, I’ve begun shooting in both the 40Mp and 80Mp modes.
I can’t explain why I’ve suddenly taken to the G9, but I do want to share some things that I’ve noticed about the high resolution mode:
- The G9 has two high resolution modes, 40Mp and 80Mp. The 40Mp produces an image with 7,296 x 5,472 pixels. The 80Mp mode generates a 10,368 x 7,776 pixel image.
- When you take an image using high resolution, the camera fires several frames automatically. Then between each frame the sensor shifts very slightly. The image sequence is then processed in camera to produce the final image.
- There is a separate quality setting for the G9 in the high resolution menu section. This operates separately to the regular quality setting for the camera. It’s where you can set what format file you want to produce, either JPEG, RAW or a combination of both. You can also set it to record a regular sized RAW file alongside the high resolution image.
- There is a great shutter delay feature which allows you to set a timer delay from pressing the shutter to the images being captured. The default seems to be 2 seconds but you can reduce this down to 1/8 second (or turn it off) and extend it to 30 seconds. I found this invaluable recently when I found my camera remote playing up. It’s much more flexible than setting the timer on the camera.
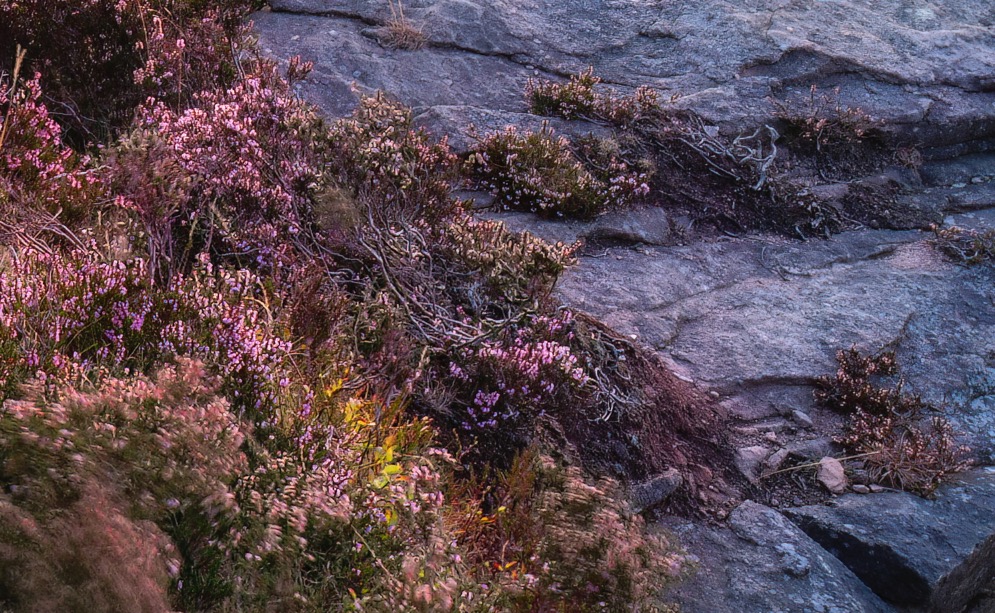
- The images captured using the high resolution mode are not only sharp but very clean. There seems to be much less noise generated at high ISO than with a standard image.
The amount of detail that the high resolution mode can capture is absolutely breathtaking. Look at this section of the 80Mp image at 100% magnification.
But everything isn’t perfect when using high resolution and there are a few problems to be aware of:
- You need to be using a tripod. I think Olympus may have developed a hand held high resolution mode, but certainly with my Panasonic G9 I need to use it on a tripod. For landscape photography, this isn’t really a problem as I use a tripod most of the time.
- There is a limit on the shutter speed which I think is 1”. If it’s too dark to achieve a 1” exposure your images will be under exposed. Again, I don’t really find this an issue because even when you increase the ISO setting the images are extremely clean.
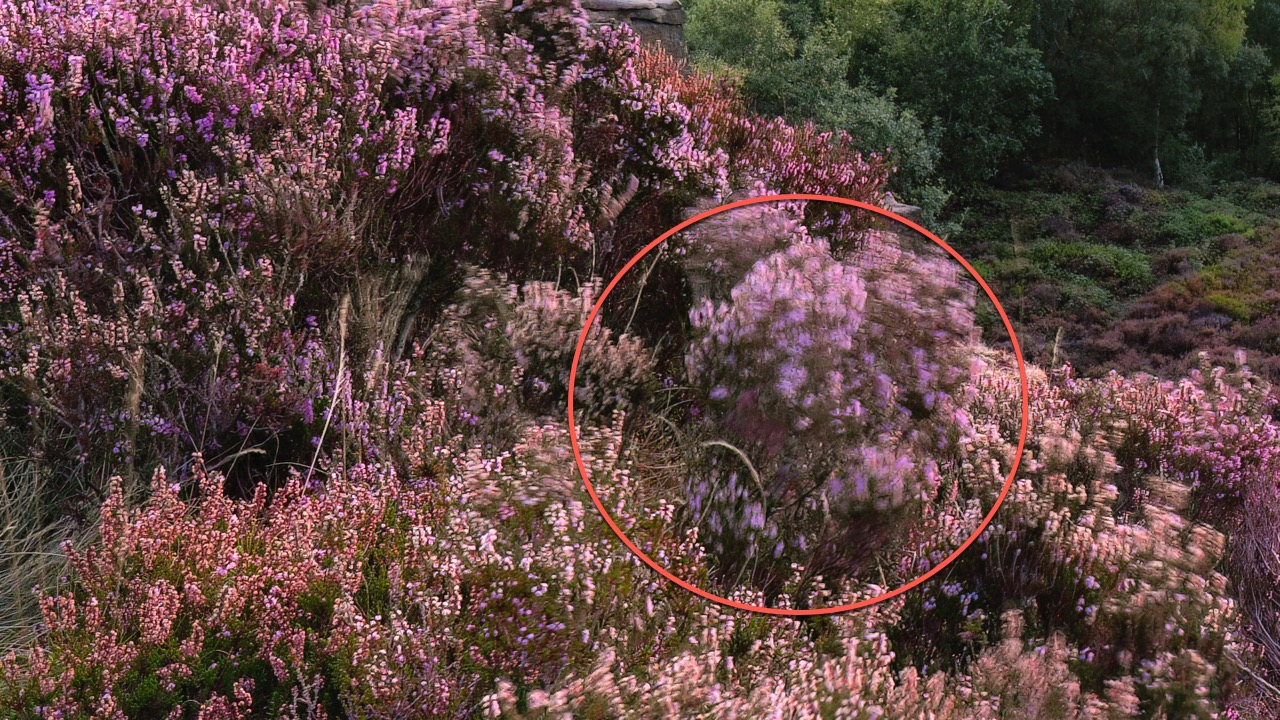
- Moving subjects can suffer from a ghosting effect.
This last point does seem to be a problem for landscape photographers as elements in the landscape often aren’t still. But I’ve found two ways to minimise this.
The first is to slow the exposure which is kind of counter intuitive. By slowing the exposure, it blurs the movement more and the images then blend better in the high resolution processing.
The other is a setting I found in the G9 high resolution menu which is the motion blur process. This has 2 modes. Mode 1 makes blur appear as an after image in the picture whilst mode 2 minimises any after image. The default is mode 1 (I think) but I’ve recently switched to using mode 2. This combined with slightly longer shutter speeds seems to create a great effect which you can see here.
I’ll be continuing to experiment with the G9 high resolution mode and will probably be using the camera more in the future.
I hope you like the image and have a great weekend.

I have a 45.7 megapixel camera and while I appreciate the resolution, the file size can kind of swamp my computer during editing. This is especially true for doing merging for things like focus-stacking. I like the resolution, but I don’t think I’d trade it in for a 60MP camera or similar unless I was moving up to medium format.
Another question I always wonder is: can the lens actually resolve the image to the fineness of the sensor photo receptors? I am sure that the pro-level primes are good, but I also shoot with a kit lens or two that probably will not produce a sharp enough image for such a sensor.
If Nikon would have made a camera in between 24MP and 45.7MP, I would have probably gone for that.
Whilst not having anything to compare it to, I’m pretty impressed by what the 12-60 Panasonic lens can do. If you want me to share a RAW file drop me an email.