If you’ve been reading this blog for the past couple of weeks you will know that I became frustrated by the quality of my Fuji images. The result was that I purchased a micro 43 camera. A Panasonic G9 to be precise.
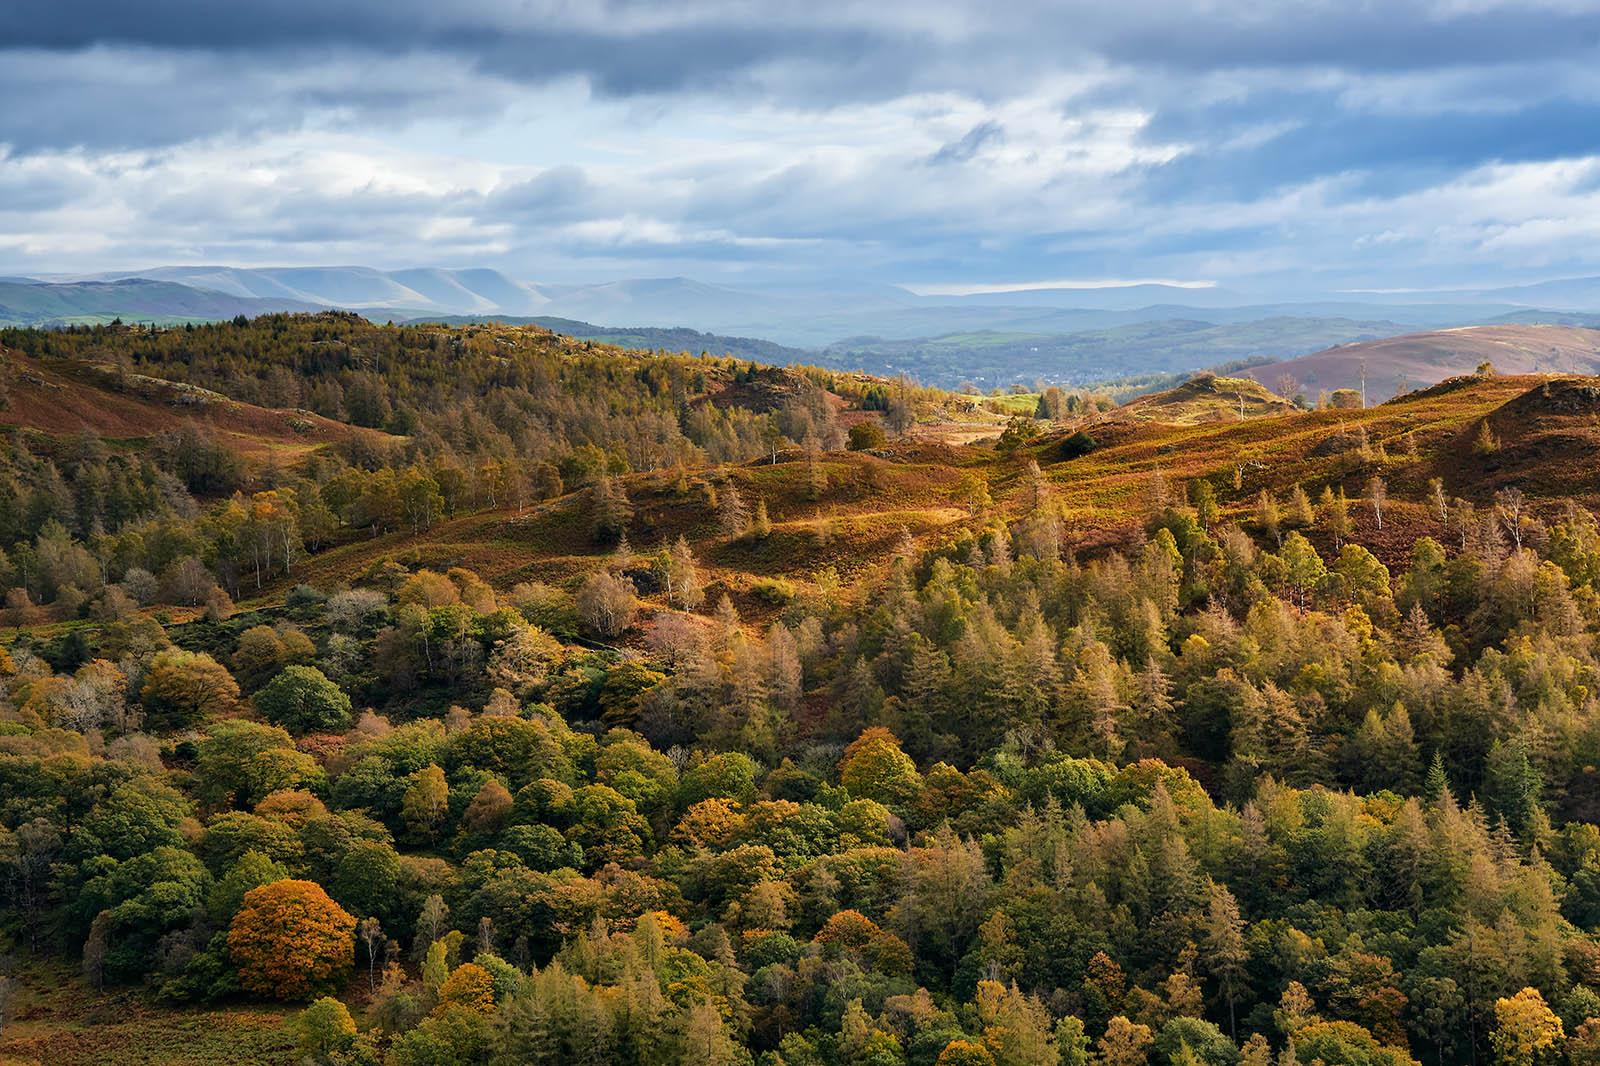
I’ve now been out a couple of times with the G9 now and I’m pleased with the results. More importantly, I’m finding it a pleasure to carry and work with. The lenses are smaller and the accessory equipment lighter. Photography when walking is a more enjoyable experience, and the image quality is good. Here’s an example from a walk yesterday over near Ladybower where I was shooting some stock Autumn images.

Now for the Fuji XTrans
When I was making my decision to purchase the G9 I said that I wasn’t abandoning the Fuji system. Having spent a lot of time trying to extract the best image quality from the Fuji XTrans RAW files I was certain the problem was software related. There is a clear difference in image quality between different RAW converters. Some seem to turn the fine image detail to mush whilst others create an odd, cartoon effect.
Then someone mentioned they didn’t have any problems with the “wiggle worm” effect when responding to last week’s post. They said they used Lightroom but turned off all sharpening and noise reduction before applying Topaz DeNoise early in their processing.
Usually, I ignore it when someone says they don’t see the problem with Lightroom. It’s the way Adobe demosaic the RAW files that cause the effect. But this reply got me thinking and I decided to try something similar. I turned off the noise reduction and sharpening and applied all my adjustments in Lightroom. I then took the image into Photoshop where I applied Topaz Sharpener AI (I found this better than DeNoise) on a new layer. The results are quite simply staggering.
I won’t say anything more now but I’m planning a video on the subject when I’ve done further investigation.
Thank you to Graham Thorpe for suggesting this.
What Made me Consider a G9
Back in the post where I was considering another camera, I also said that I couldn’t share why. Now I can.
I’d been trying out the new DxO PhotoLab 4 which launched earlier this week. I had a pre-release version which was under NDA until now. It was using the new DeepPRIME feature (as well as a few others) that made me realise how good the results from the G9 could be.
You can watch my review video for PhotoLab on YouTube (https://youtu.be/wpNu0qmpKFM).
I hope that you’ve found something in my rambling interesting and have a great weekend.

WOW!
Thanks
For me it helped a lot to convert the Fuji RAFs to RGB-DNGs using the Irident X-Transformer: https://www.iridientdigital.com/products/xtransformer.html
The transformed Files have noticably better Sharpness and Signal-to-Noise ratio.
This cirumvents the bad Algorithm Adobe uses for Demosaicing the X-Trans pattern while allowing the full raw processing to happen. Also in my tests, this was much faster than Adobes AI based “optimizing” tool.
The main drawback is that X-Transformer is producing big files and if you keep everything, you’re more than doubling the storage requirements.
Yes, I already have both Iridient developer and XTransformer. I have been using XTRansformer (and sometimes Enhance Detail) in Lightroom when I want to work using Smart Objects. I’ve also tried disabling the sharpening and then running the unsharpened output through Topaz Sharpener AI which seems to be better. I don’t want to say too much at this stage but I still think Sharpener AI is what’s making the difference.
yes, for me you are the Master: you can see the subject , understand what you see, find the solution, and as top – improvisation. Just perfect. But, why you don’t use C1 2020 with PS CC ? I use the XT2 wit prime lenses. My problem is, I dont understood how to use the sharpening in C1 ( here I use sharpening by 180/ 0.8) und than how much in PS CC for printing. Or, is it too much ? The C1 give in my opinion very clean colors and very good WB. The ColorGrading is helpfull too. I waiting for your Video about Sorry for my English, my last lesson was in the school for ca. 30 Y. Thanks a lot for your job and keep well.
Please don’t apologise for your English.
C1 is an excellent program which I use for my Fuji RAW file processing. The default sharpening settings are similar to those you mention and then they will work fine with most files. Hopefully the approach I’m going to explain in my video will give you an alternative. I also want to spend some time comparing the results with tools like C1 before I produce the video so it may be a few weeks away.
sorry, it muss calling in my comment – I wait for your Video about adjustment in LR ( in my case just CR) and Topas AI Sharpening agains DeNoise. Thanks.
Hello,
Thanks for sharing your journey between camera systems. Researching the merits of the Fuji system is what lead me to your blog and latest string of posts. While I currently have Canon APSC and Micro Four Thirds, I’m tempted by Fuji as a strong middle ground between size/portability and quality. However, recently, I downloaded some sample RAW files and ran them through Lightroom. I was not impressed with the Fuji files. As others have noted, the details at 100% looked smeared or almost like they were passed through a “paint” effect filter compared to my stunningly sharp GX9 files. With post processing being an integral part of digital photography workflow, I cannot get past the Fuji/Lightroom conundrum. I’m curious to hear more about the editing breakthrough and how the G9 stacks up.
Hi Mike,
I’ve been doing a lot of investigation into this and I still need to do some more. The problem is related to software and seems to be a combination of a few things. I’m going to be working up a fairly lengthy post on my Lenscraft website but it’s a few weeks away yet. Basically it boils down to the way some of the lenses perform in combination with the Lightroom demosaic routine and the sharpening/noise reduction. If you want a quick fix to using Lightroom with Fuji use eitehr the “Enhance Detail” setting in Lightroom on the RAW file or XTransformer (I think XTransformer is better for reasons I will share later). If you don’t mind switching RAW converter then Capture One is pretty good with most of the Fuji files. Do beware of sample RAW files on the internet. I’ve seen some poor examples being shared to illustrate the watercolour problem. Mostly these are suffering from poor focus and or depth of field. Fuji files are very sharp and the depth of field can fool you. I recently had a tiny spec of dust in the rear element of a lens that most cameras wouldn’t resolve. In the Fuji it showed up as a spot and you have the same problem with rain on the lens. The Fuji seems very good at focussing on the rain spots. The smearing effect is usually an operator or lens issue. The wiggly worm effect seems to be down to software procesing of the RAW file. More to come…