In past blogs I have discussed how useful I find the Color Passport from Xrite. Initially I used this to set my white balance in the GX1 so that the AWB setting I tend to use almost 100% of the time is more accurate. Previously this was setting the colour temperature to 4,700K and the tint adjustment in Lightroom to 0. Having created a custom white balance the colour temperature has increased to 5,400K and the tint to +8. These are significant corrections and ones that I probably wouldn’t have landed on myself.
The other thing I have used the Color Passport for is to create a custom calibration profile for the GX1. Again this is having a dramatic effect as the contrast increases, pinks have become more vibrant, orange less saturated and blues and greens look more natural. I now use this profile as the starting point for all my conversions for the GX1.
The other night I was adjusting images before sending them to my stock library. My workflow for this uses a separate package for keywording and Lightroom for the RAW file conversion. What I happened to notice when doing this was that the thumbnails in the keywording application appeared more natural than the image in Lightroom, despite having used my custom camera calibration. After a little adjustment to the calibration slider I found setting the Green Hue to -33 and the Green saturation to -11 gave me much more natural Landscape greens.
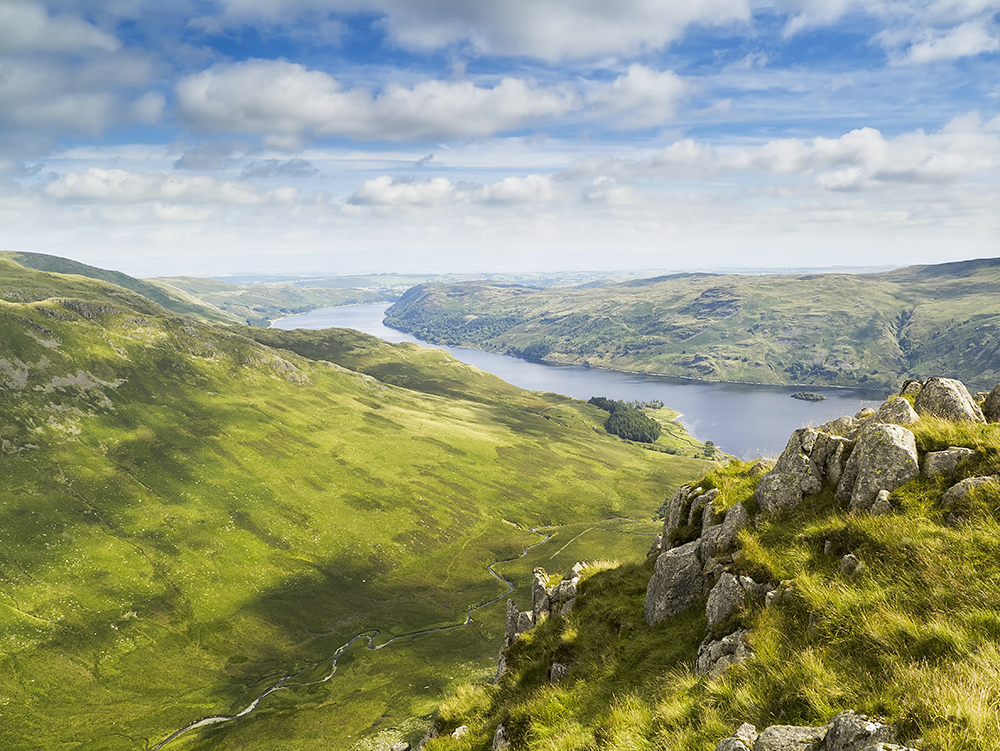
Now I don’t know if this setting will work for all images so I decided to apply it to other shots in the batch. I created a custom Lightroom Preset and applied it to a few others. Yes they improved but there was also an interesting side effect with some. Applying the preset seemed to change the histogram substantially. Histograms that lacked contrast and that were gathered in the mid tones now extended across a greater tonal range and in some instances filled the histogram. Looking more closely at these images I found the details appeared crisper (which might be expected from improved contrast) but the luminance noise appeared reduced even though I hadn’t applied any noise reduction. Whilst you might struggle to see what I am talking about at this reduced resolution, here is a comparison from the above image (click the image to enlarge).

I will keep a close eye on this in the future, but it seems to have given a promising improvement to quality, which is all important with stock images.

I can see quite clearly the results that you have achieved in the attached images but unfortunately find the explanation of how you have achieved these results a bit mind blowing.
I feel that a good few of your readers, including me, would appreciate & would find it very useful if you were to produce a bit of a write up of exactly how you went about the actions that you took above. I would like to know how you:
1. How did you set the WB in the GX1? Excuse my ignorance but I assume that this is done within the camera?
2. “Having created a custom white balance the colour temperature has increased to 5,400K and the tint to +8.”
How did you do this? Is this in the camera again so as to alter the images that you are taking or is this done in PP on your computer?
3. I think that para 2 is done on your computer, but then again I may be totally wrong. Again, how do you go about this?
4. How did you go about doing the last sentence in para 3?
I am sorry to ask so many questions & if you feel that this is a pain to answer all, or you giving away trade secrets, then please say so & I will perfectly understand. I am sorry that I am showing my ignorance but I was always taught if you do not ask you will never find out.
Bes regards
Paul
Hi Paul,
Sorry for not including more detail but I tend to gloss over things a little in the blog and save the meat for my articles. But to answer your questions which I am always please to do:
1. The GX1 has two custom white balances that you can set in addition to the standard setting such as AWB, Shadow etc. They are selected through the WB menu and provide the option to register an image for use as a colour point. To create a custom white balance I used the Grey Card that comes with the Color Passport and registered this. The camera analysed it and worked out the colour temperature and tint to make the card appear neutral ie a white balance. Once I had created the custom white balance I can set the camera to use that just as I could any other white balance setting.
2. The settings of 5,400k and tint +8 are what Lightroom shows when I open up a RAW file using my custom white balance. If I use the AWB setting in the camera it tends to be a colour temperature of 4,700k and a tint of -2. This makes the image look quite blue/green rather than neutral.
3. Para 2 is done on the computer and it’s basically ho you use the color passport checker. You take a picture of the colour chart in both direct light and shade. You then use the color passport software to analyse the two images and it generates a colour calibration for your camera based on this. Now when you open up Lightroom and switch to the Develop Module you will find a new calibration available in the Calibration tab (very bottom of the tools panel on the right of the Develop module screen). I will be writing a tutorial for ePHOTOzine about this in the near future and will also post it on the members are of Lenscraft.
4. The last sentence of para 3 describes the sliders found in the Calibration section of the Develop panel. Open Lightroom and select the Develop module. The tools panel is on the right hand side so scroll down to the bottom of this and you will find a section called “Calibration”. This is where you can select the calibration profile for your camera (although most just have Adobe Standard). What I describe in para 3 are the settings I changed the sliders to.
Good luck with your experimentation.
Robin
Thank you for all the explanation. That has helped greatly to my understanding “the tricks of the color passport”
No problem Paul. Always please to be able to help out.
Hello Lightweight Photographer !
I found your settings “Green Hue to -33 and the Green saturation to -11” very useful.
I’ve spent a lot of time in finding the right green colors for GX1.
As for me, I prefer -40 and -3 settings.
Could you share your “custom calibration profile for the GX1” ?
I’ve tried last version of Huelight GX1 profile http://colorfidelity.com/ but I’m not enough happy with them.
Im currently shooting in a remote location. I will see what i can do when I’m next back.
Thank you in advance!
Check out my latest blog for details of how to download my GX1 custom profile.
I was a little skeptical, but this brings some lovely pep to the RAWs from my GX1. Many thanks for sharing it with us.
Two questions. Would you expect it to work with any version of Lightroom (it’s fine with 4.2 but not 4.3…)
Do you have any LR presets you use regularly that you would like to share?
(Though I’m positive this isn’t the route you have in mind for this blog!)
Thanks!
R
Hi Rich,
I would expect the settings to work with any version of Lightroom so its worth checking if you have inadvertently made some other adjustments. Having said that it’s not beyond Adobe to have made some adjustments to how the coour engine rendering works even though the move from 4.2 to 4.3 is a minor release. The other thing that you might like to try (if you haven’t already) is the colour profile I created for my GX1. You can find a link to the blog and how to download it here.
As for Lightroom Presets I don’t really use them other than to set my defaul starting position for editing images. I will however think about this for the future as I have seen some impressive results with other peoples work.
Thanks for commenting.
Sorry, I should have been clear. It was your profile that was providing the pep! It’s proving invaluable.
4.3 definitely isn’t playing ball with it… No big deal.
Ah, sorry for the misunderstanding. In that case it should definately work as I am using Lightroom 4.3 and it works fine. Might be an idea to remove it and reinstall if you haven’t already tried that.