Last week, I mentioned that I love to capture painterly light when photographing the landscape. A few people commented and some emailed me directly. It appears there is an interest in what the original RAW file looked like. I’ll come to that in a moment, but first I want to share another example of painterly light.
I found this in my image library last night and it’s the first time that I’ve processed it.

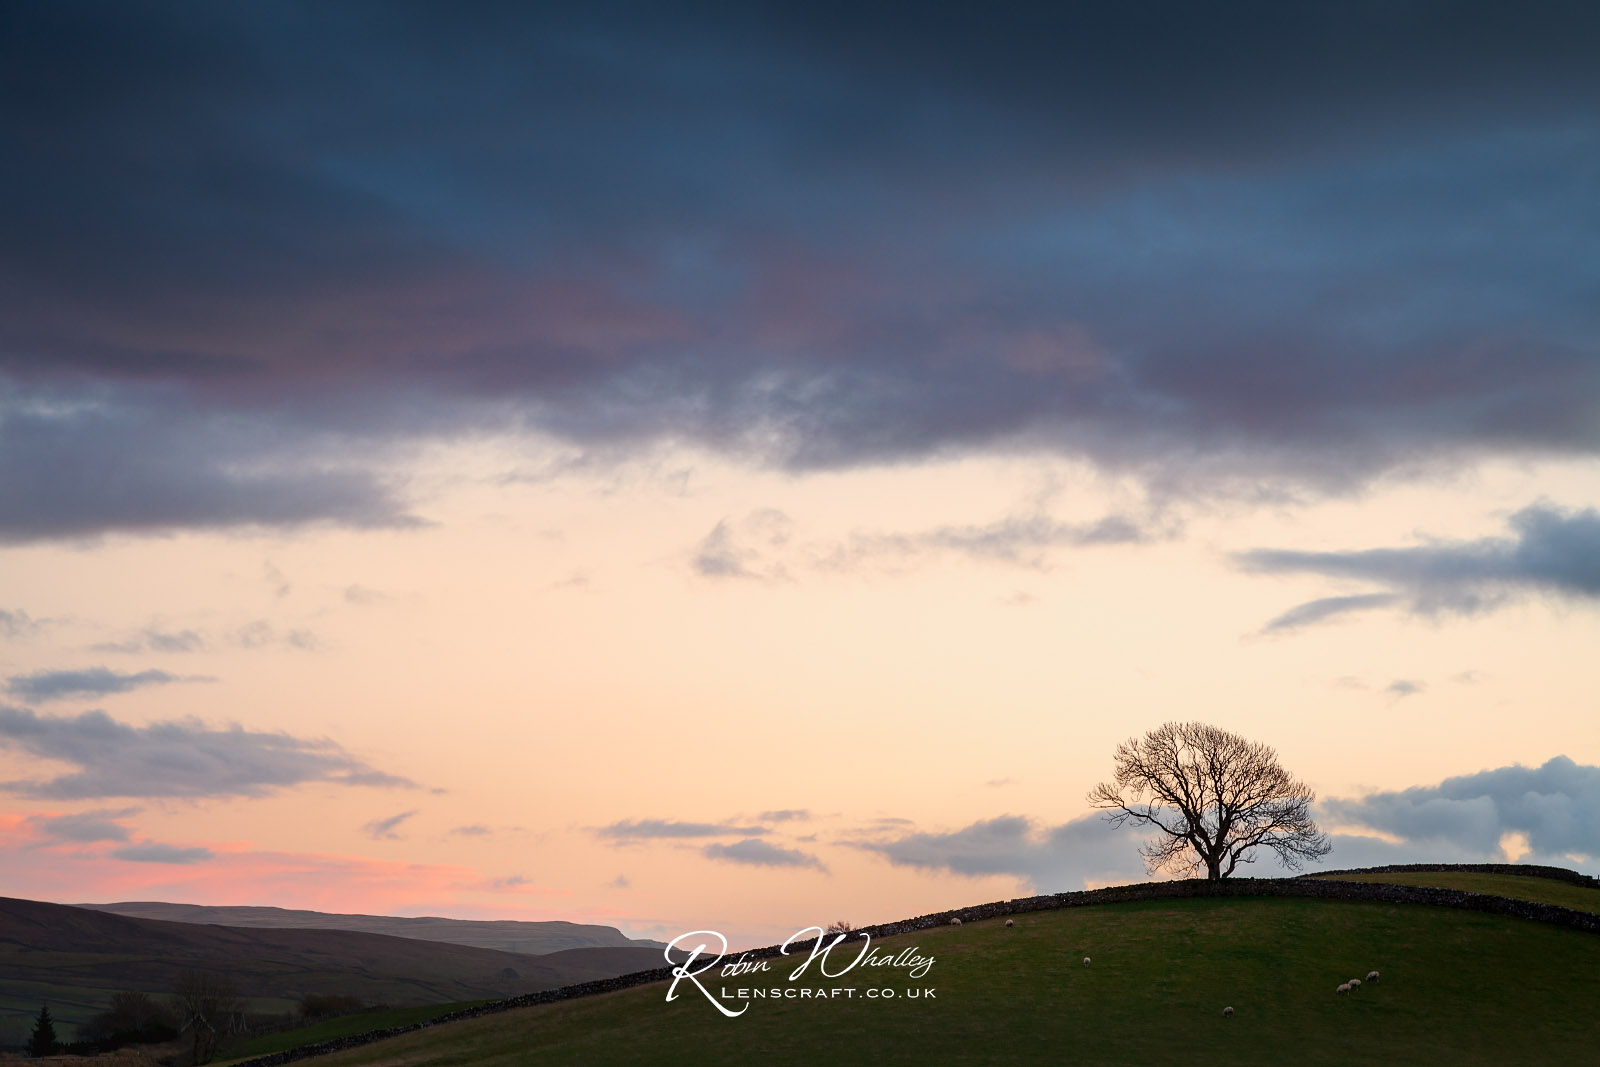
I shot this scene in the Yorkshire Dales, back in 2012 using a Canon 5D MKII with Canon 24-105 L lens at 32mm. It’s two frames which I’ve stitched together in Lightroom. I shot them handheld at 1/250 second using f/8.0 and ISO100. I did use a ND Grad filter to control the exposure of the sky, but I don’t know what strength it was.
Are you wondering why I ignored this shot until now?
Well, here’s another from the same day that I also haven’t bothered with.
This is also shot with the Canon 5D MKII and Canon 24-105 L lens, this time at 82mm. Again, I would have used a ND Grad filter on the sky, but I don’t know what.
The answer to why I haven’t bothered processing these is multi-layered. First, I don’t think that my photo editing skills were as good, so I wasn’t able to produce the image that I saw in the RAW file. Second and most important, I couldn’t imagine how I wanted the finished image to look.
To understand why, you need to know I developed my photography skills shooting with slide film; mainly Fuji Velvia 50. My idea of a good shot at the time was strong, saturated colour whilst avoiding blocked up shadows. That was then carried over to my digital work.
This is important because it’s made me realise that our experiences influence not only what we photograph but the look we produce in our photography. In the past I ignored both images because of their deep shadows yet now I like them.
Now to the question of the RAW file from last week’s photograph.
As I mentioned to someone in one of the comments, it’s very difficult to share the original, unprocessed RAW image. The reason why is illustrated below.
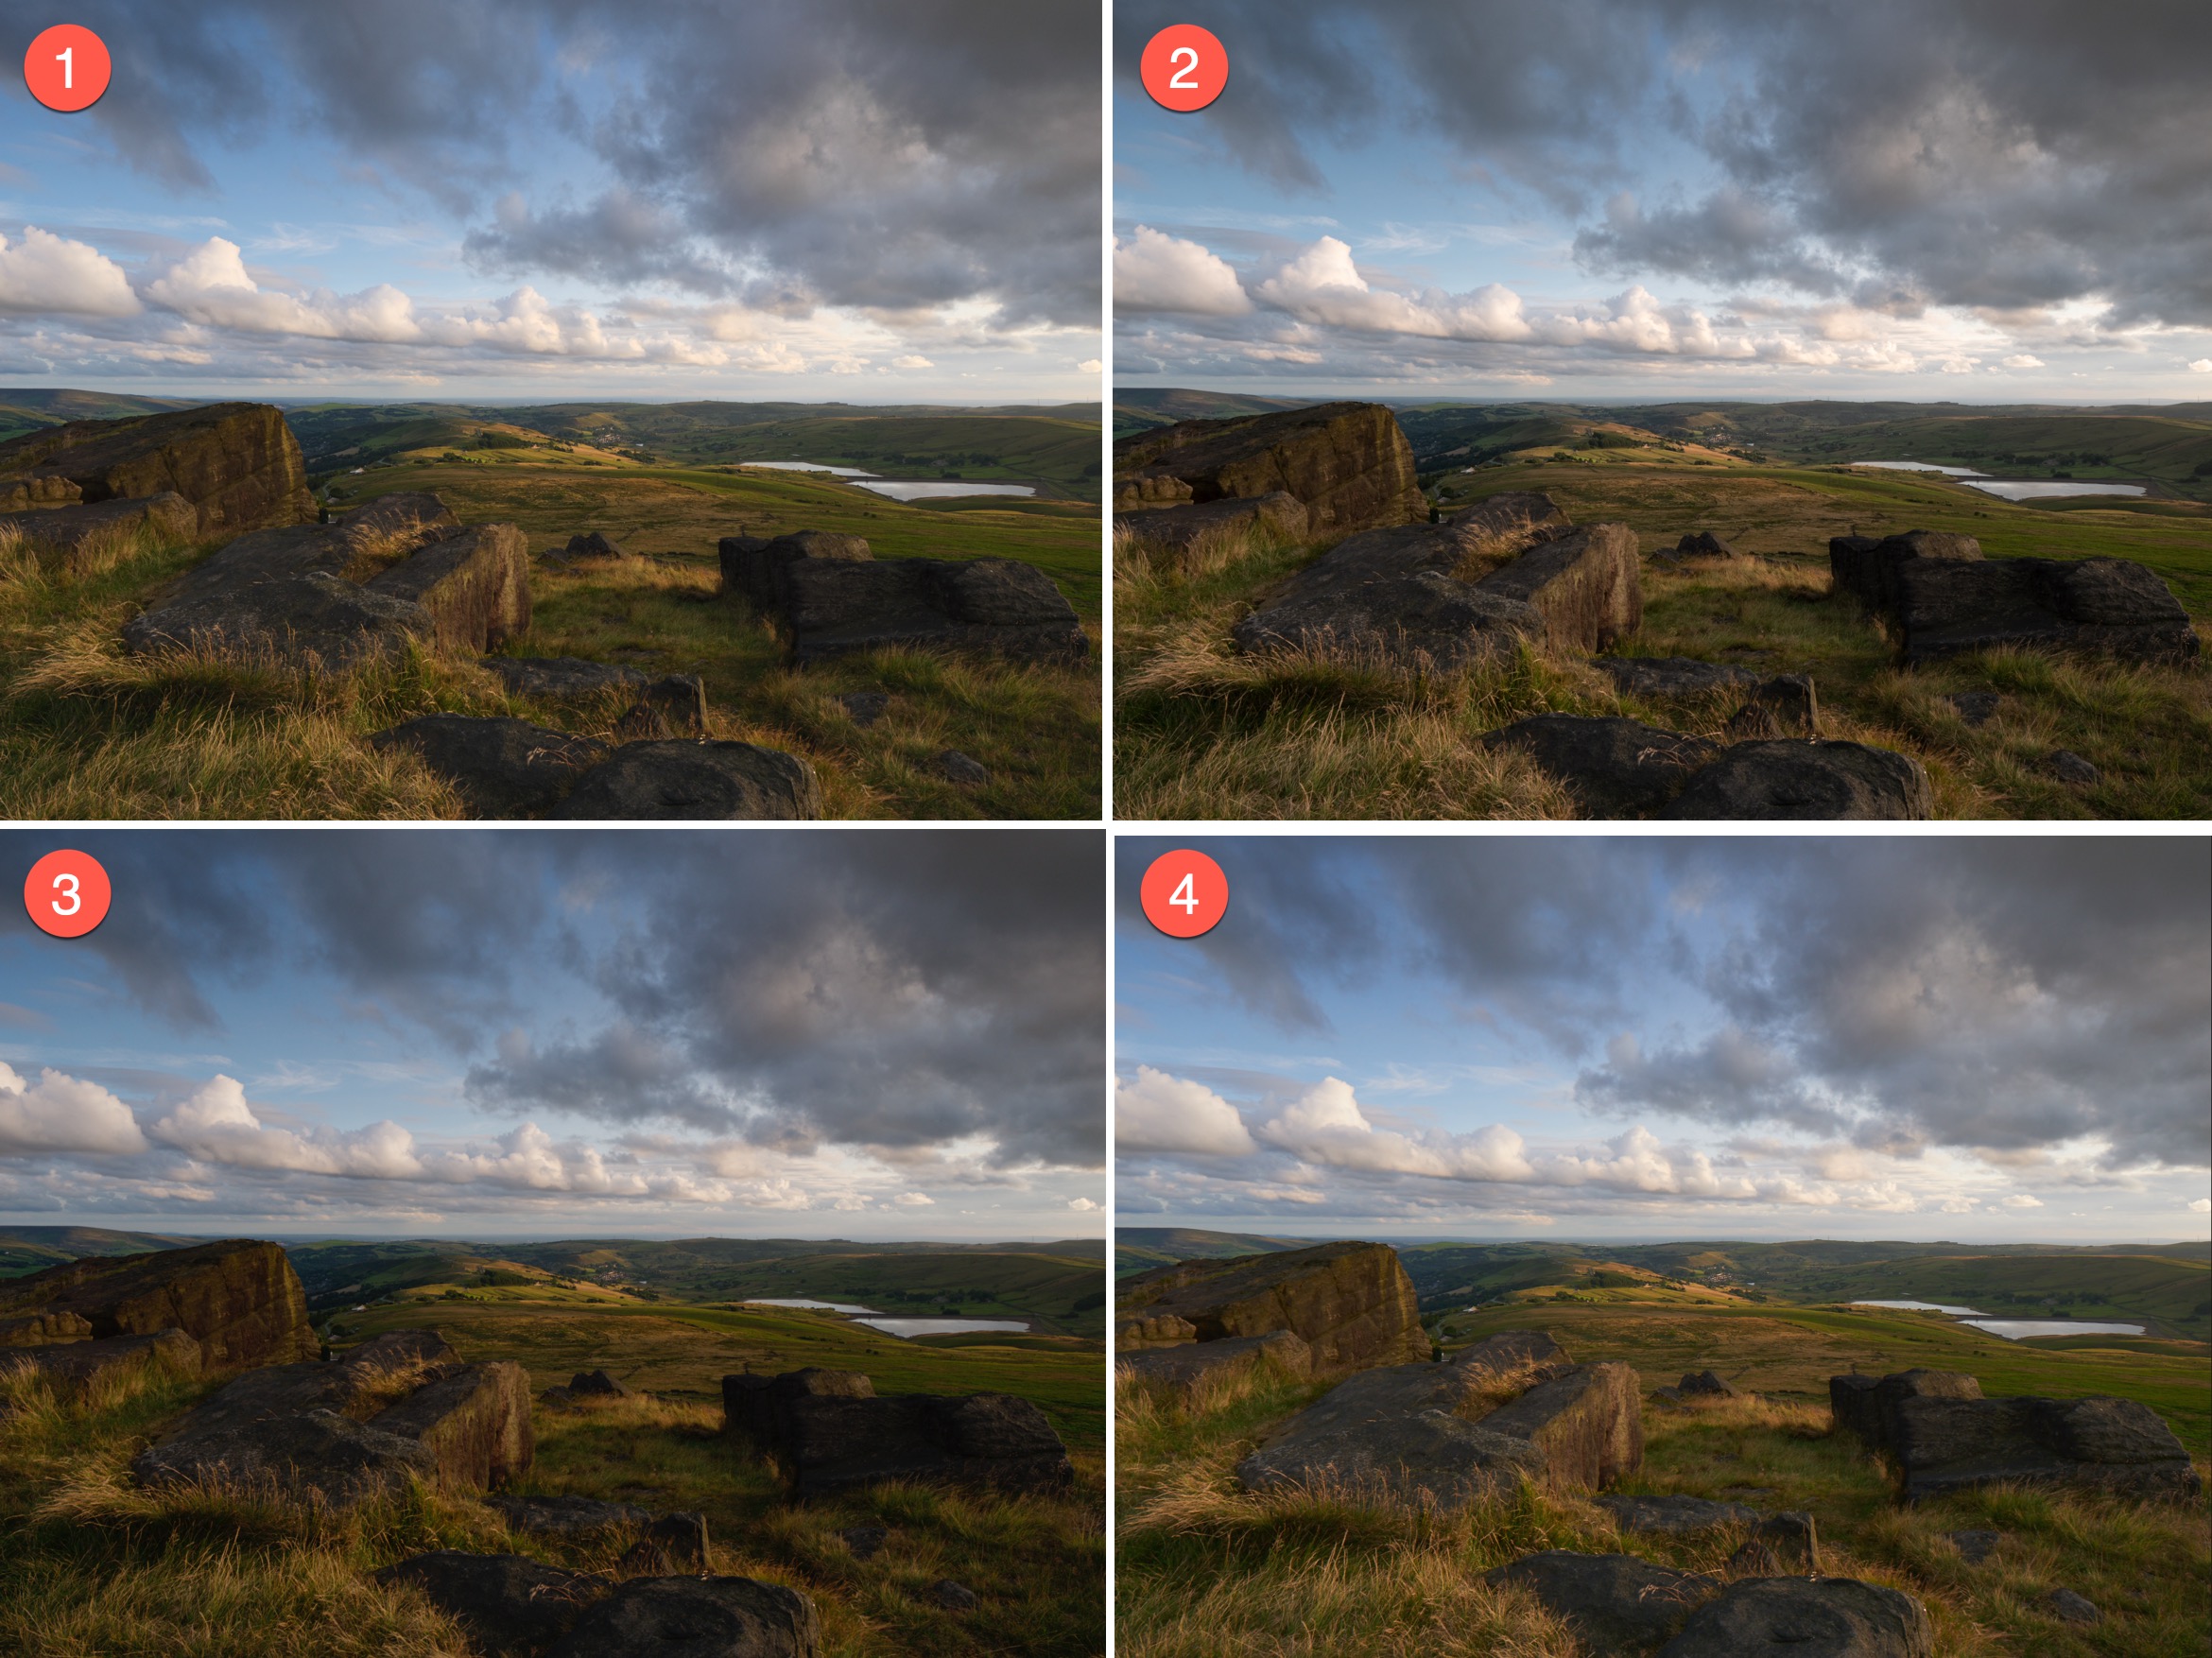
To display a RAW file as an image, there is always some processing, otherwise you wouldn’t see an image. This happens even when there are no adjustments applied.
Here’s what the four samples represent. In all cases it’s the unprocessed RAW file you are seeing:
- The image in Lightroom using the camera profile set in the camera when the shot was taken.
- The image in Lightroom using the Adobe Color camera profile. I’ve included this as many photographers have Lightroom configured to use this profile rather than respect the one set in the RAW file.
- DxO PhotoLab with no profile set. My assumption is that the RAW file still uses the default DxO profile (or we wouldn’t be able to see the colours in the image).
- Capture One with the Generic Capture One profile set. This is set automatically when the RAW file is opened.
I don’t know how well this comes across in the images, but the RAW file looked quite different on my Mac when I opened it in the different applications. I should also point out that I had the camera set to auto white balance, so it’s removed much of the warm light from the RAW file. That’s also covered in this weeks YouTube video where I share 5 ways to colour correct an image using Affinity Photo.
I hope you have enjoyed this week’s ramblings and have a great weekend.
