I’ve just been looking through my photo archive when I found a folder I didn’t recognise. Inside were other folders and inside those were thousands of images. Images that I had shot a long time ago using a Panasonic GX1 infrared camera. For some reason I hadn’t imported these files to Lightroom.
Wow!
Thinking about it I probably didn’t bother because the white balance in Lightroom doesn’t work for infrared RAW files. After that, I probably forgot all about them until just now when I’ve rediscovered them. The problem is that I can’t remember where I was when I shot a lot of them and there are some, like this image, that I really like. I guess I’ve just learned a valuable lesson about organising my photos.
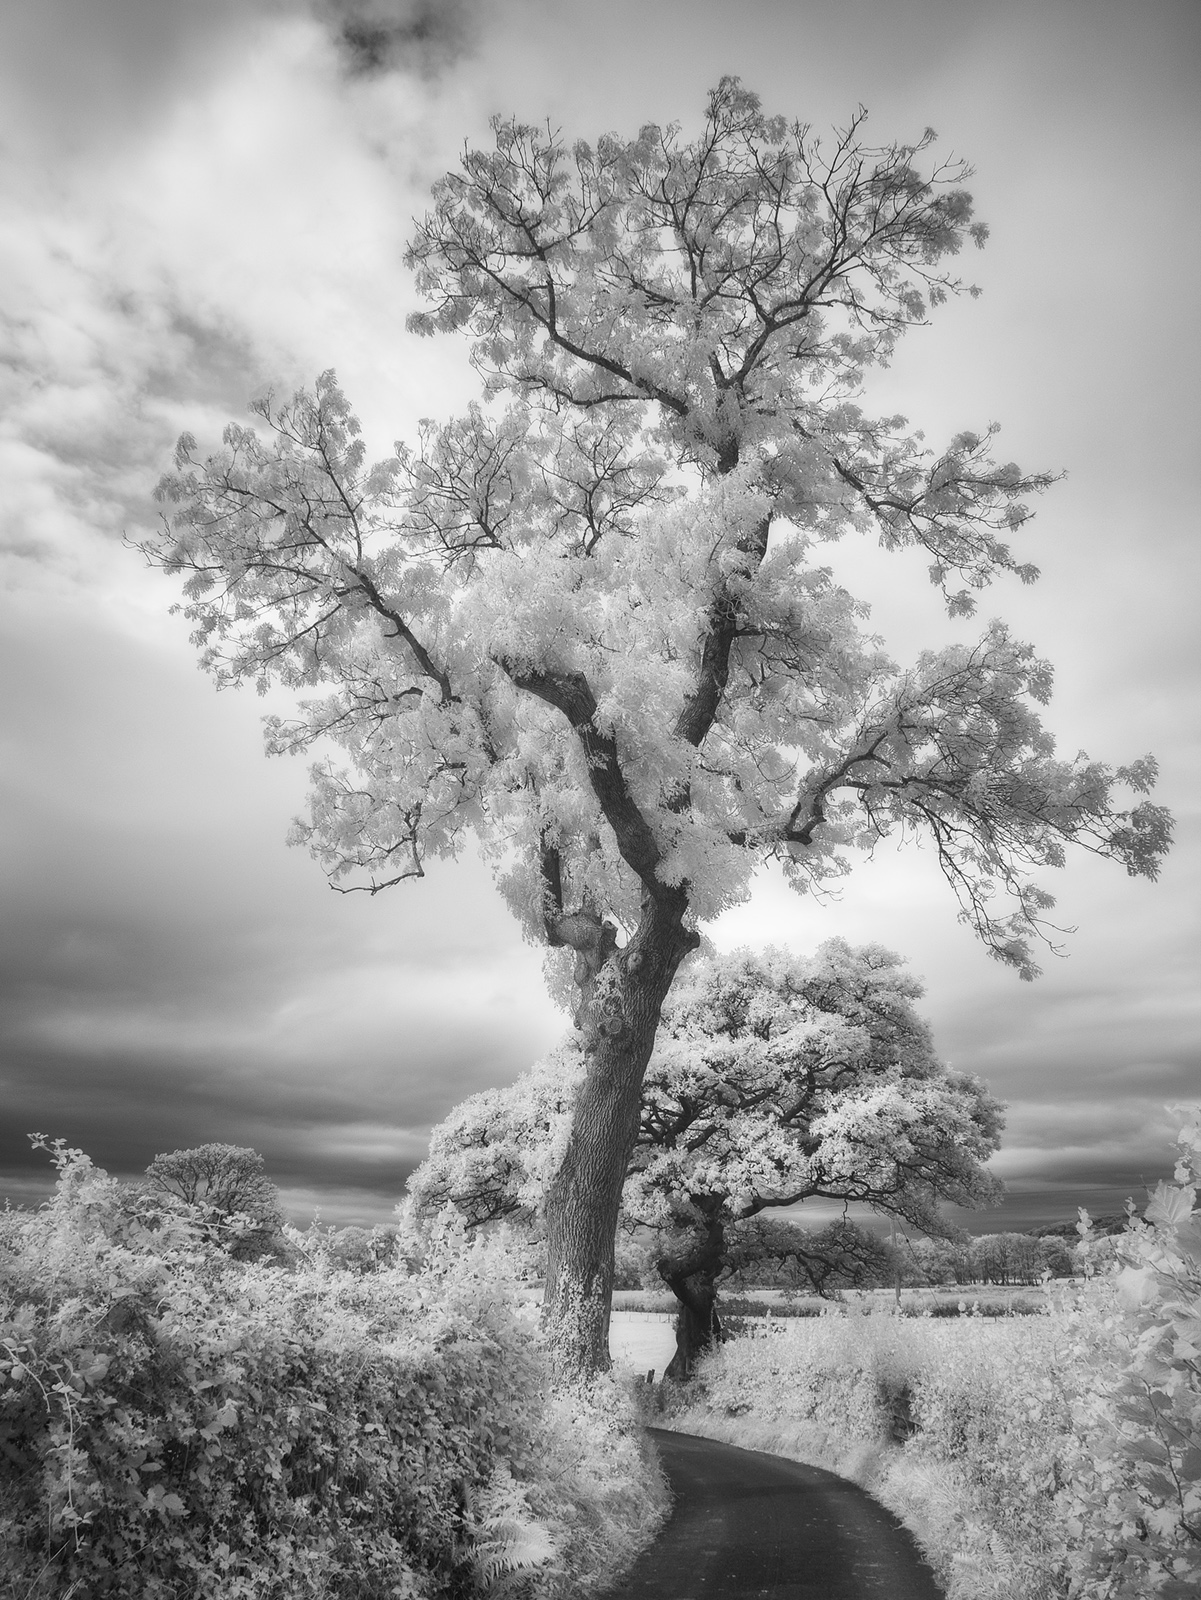
As I mentioned, this image was shot using a Panasonic GX1 which had a 720nm infrared conversion. If you’re not sure what that is, see my Infrared what you need to know article. The lens was an Olympus 12-40 at 12mm. I’m guessing this was a handheld exposure given the scene and that the shutter speed was 1/200” at f/7.1 and ISO160.
I did the RAW processing using Capture One and what surprised me was how good the image quality is. Originally when I was processing RAW files from the converted GX1 in Lightroom they appeared very noisy and poor quality. Now in the latest version of Capture One, they look great (that’s another lesson). After that, I converted to Black and White using Nik Silver Efex Pro before taking the image into On1 Photo RAW to apply a slight glow to the leaves.
Now let’s move on to this week’s video.
YouTube Video
This week I’ve published another YouTube tutorial which is a compilation of tips about Nik Color Efex Pro. Whilst most people will know some of these tips, probably very few people will know all of them. The video is only about 10 minutes and well worth watching. Here’s the link if you are interested (https://youtu.be/Enf3yOZTWss).
I’m going to leave it at that for this week. I have a large folder of photos to investigate.
I hope you like this week’s image and video and have a great weekend.

Lovely IR image.
BTW, don’t you gps-track your images while hiking? That will make sure you know where you shot your images from.
I use a dedicated Garmin GPS, and sometimes back it up with my iPhone GPS app. If I’m on a long lonely hike, I don’t use my iPhone, because it takes up too much juice from the battery….and I might need the iphone in an emergency.
These photos were taken 8-10 years ago with a small micro 43 camera. The GPS units back then were probably larger than the camera and phones were really much help either. We really have come a long way in a short time.
I like infrared, but already spread out to thin to get into one more thing. Beautiful effect.
I know what you mean. There are so many things competing for too little time. For me, it gives a completely different look to an everyday scene. It also allows me to shoot landscapes through the summer in the UK light doesn’t suit a conventional camera.
Now that’s an idea. Here in California I pretty much don’t shoot in the Summer. The sky is blue, there is no cloud, the light is too harsh and the day is too long to make effective use of golden/blue hours.
And that’s exactly why I invested in an Infrared conversion. I suspect when I shot this image it would look terrible with a conventional camera but the infrared looks great. You also often find a featureless grey sky has great definition when viewed with infrared. It’s worth experimenting with.
Great shot – stunning !
Thank you
I like your comment about IR, and perhaps when I should be using it, as I am in California. Gotta break out my 720 filter….
I found converting a camera to IR is one of the best investments I made. It keeps me shooting even when the conditions aren’t great for traditional cameras. I have two converted cameras, one is for my Fuji XT system and the other my Micro 43. It means I can just carry an additional body with whichever system I want to use. It cuts down on the weight because you don’t need two sets of lenses.